Gregory’s Film Articles
- Nikon N75 (F75) review
- Nikon F3 review
- Nikon F6 review
- Voigtländer 40mm review
- Portra 800 for colour and B&W
- DxO perspective control
- Ektar 100 latitude
- Portra 800 review
- DxO film simulator
Nikon N75 (F75) Review
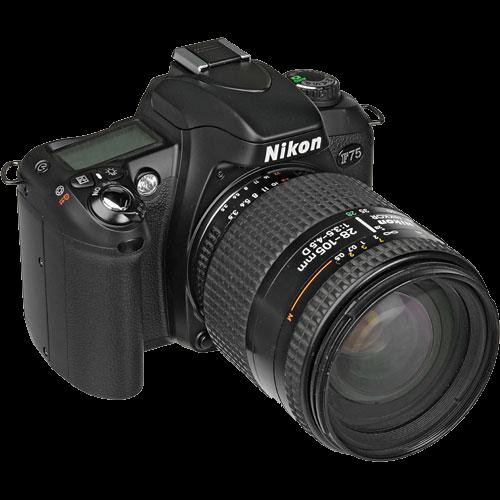 The N75 is a tiny, ultra-lightweight design of only 410g (14oz) when loaded with film. It is an ideal travel SLR for use with auto-focus lenses. The electronics are excellent, giving reliable exposures at all times. The built-in flash gives indoor coverage for 28mm lenses and the camera will calculate full balanced flash fill in daylight.
Combined with the Nikon 24-85mm f/3.5-4.5G the weight is 875g (31oz). A classic pairing with the small 50mm f/1.8D drops the weight to only 565g (20oz). Comparisons with modern full-frame DSLRs is instructive.
| Nikon N75 | 410g | (14oz) |
| Nikon D610 | 760g | (27oz) |
| Nikon D780 | 830g | (29oz) |
| Nikon D850 | 1,010g | (36oz) |
| Nikon D6 | 1,450g | (51oz) |
General Comments
I now keep an N75 with me for Ektar or Ilford XP2 Super. When it was my only film camera I often used Portra 800, a film I now use in my F6.
Loading is automatic, with the film being wound out of the canister before the camera is ready to fire. This solves the problem of low batteries at rewind time. It also guards against accidentally opening the camera back before finishing the film, since most exposed images will already be inside the canister.
Film speed is set at the DX value (box speed) in full “Auto” mode but can be overridden in other exposure modes. Compensation values are in half stops.
Focus options for the five focus points are:
- Dynamic AF – Closest Subject Priority (fully automatic, active sensor shown)
- Dynamic AF – Center Subject Priority (better in low light, active sensor shown)
- Dynamic AF – user selected focus point (camera may override if subject moves)
The central focus point is a cross-type and far more sensitive in low light than the other sensors. All three focus modes work well in good light. Indoors a focus assist lamp can be used. Occasionally in daylight the camera is slow to focus on very low contrast subjects.
In addition to the standard AMSP modes there are several other presets available on the top dial. These are mostly variations of the Auto Multi Program Mode which is flexible, controlled using the thumbwheel to alter exposure combinations.Thoughtful use of the Aperture Priority or Speed Priority modes will give more control.
The exception is the Sports Mode. This is the only way to manually activate continuous focus for moving subjects. In normal operation the camera locks focus as the default, then switches to continuous focus if the subject moves. I have used Sports Mode a few times and found it to be reliable. A possible downside is that the camera also switches to Program Mode, selecting both the shutter speed and aperture. Also, the focus assist lamp does not operate.
The automatic film advance cannot in any way be considered to be a “motor drive”. At 1.5fps in continuous mode the N75 is certainly not a camera for fast action photography. And yet, compared to a manual thumb lever the camera is much faster to use. Paired with an AF-S lens with an internal focus motor rather than an older style screwdriver focus system the N75 is a highly competent snap shooter, belying its small size.
Modern features
The N75 has all the features I expect of a modern camera but some controls are hidden inside the stripped down body. Some options need to be setup in the Custom Settings Menu (CSM), meaning you have no exterior indication whether a feature is active or not. This is a nuisance but with planning I was able to set up the N75 to operate like a contemporary camera in several important respects.
1) Rear button focus
I use the AF-ON button on my F6, D500 and D6. I appreciate the extra control I gain by separating the auto focus from the shutter release. The N75 allows me to activate rear button focus by re-purposing the Auto Exposure Lock button (Custom Setting 6-2). So long as I hold this button I can re-frame my shots and fire instantly.
This is not quite like an F6 where I can tap the AF-ON button then release it, freezing the focus point while re-framing, but holding the N75 AE-L button while shooting works well. This overcomes one of the few irritations with the N75 — it won’t fire unless it is in focus.
While that sounds like a feature and not a bug, holding focus on an off-centre subject with a half shutter button press then reframing usually won’t work. Holding the AE-L button, now acting as an AF-ON button, cures that problem.
I can also lock the exposure of any part of the scene (Custom Setting 5-1) by half pressing the shutter button. With dark subjects at the edge of the frame this is preferable to using the otherwise excellent matrix metering system.
Using the modified AE-L button in Sports mode tracks subjects for as long as you hold the button down, with the camera operating in Program Mode for automatic high shutter speeds and aperture control.
The combination of customised menu settings 5-1 and 6-2 makes the N75 much more responsive, with better control over both focus and unusual lighting conditions. I have not seen this feature mentioned in other reviews although it is noted in the manual.
2) Metering modes
The N75 provides Matrix, Centre-Weighted or Spot metering depending on how the Custom Settings are configured but the current selection is not shown in the viewfinder or on the top LCD screen.
These hidden features were a major concern until I sat down and really thought through the choices Nikon had given me. While the factory defaults are well chosen for fully automatic casual snapshot photography it takes time to understand how to really control the N75. Once you have the custom menu choices configured it becomes a powerful tool.
By default all exposures are evaluated using matrix metering. This is as good as anyone could need for family and tourist photography with print film. I have the exposure compensation, available in Aperture, Shutter and Program modes, set permanently to +1.0.
Conditions have included dark interiors with VR lenses, heavily overcast days and very bright sun. The only conditions that fooled the N75 were shooting aircraft against a bright cloudy sky. A few shots below show how the N75 handled a variety of shooting conditions.
 |
|
| View full set. | |
 |
 |
| View full set. | View full set. |
 |
 |
| View full set. | View full set. |
 |
 |
| View full set. | View full set. |
In contrasting light where your subject is in shade with a bright background you can switch to Manual Mode which activates centre-weighted metering. According to Thom Hogan’s N75 Guide this is a 75/25% split. Holding the exposure compensation button while turning the single control wheel sets the aperture. Release the button to change shutter speeds.
When configuring the rear AE-L button for locking exposure in Aperture or Speed Preferred modes, Centre-Weighted OR Spot metering may be chosen. This works well enough in practice although I prefer to use the AE-L button for pre-focussing then holding the exposure value with the shutter button (see above).
3) Lens Choices
The final generation of Nikon film cameras — N75, N80, F100, F5 and F6 — can use all AF, AF-D, AF-S, G and VR models. If you are choosing lenses to use on both digital and film bodies then be aware that E or AF-P lenses will not operate on any film camera, nor indeed on many early model digital bodies.
For my uses the N75 is too small to be comfortable or effective as a serious companion to my F6 without the optional MB-18 battery grip. Large lenses up to about 1kg (2.2lb) can be handled far more easily. The grip runs on 4xAA alkaline, lithium or rechargeable batteries and has a vertical shutter release.
The only lens that ever caused me problems was the Sigma 24-105mm f/4. The vibration control was active while ever the camera was turned on, rather than cutting out after a few seconds as I expected. This caused dramatic battery fade. I have not experienced this problem with Nikon or Tamron lenses.
I share a single set of auto-focus lenses between the N75 and F6: Tamron 15-30mm f/2.8, Tamron 45mm f/1.8, Tamron 90mm f/2.8 Macro and Nikon 80-400mm f/4-5.6. All perform flawlessly.
All Nikon AF-D lenses will run well on the N75, but neither the N75 nor the N80 will meter with fully manual lenses. If you already own classic Nikon AI-S lenses then the N90s or F4 will meter correctly, and give you more professional grade features, but you will lose VR activation. That of course is a non-issue outdoors daylight as VR is for indoor and night photography.
If you want maximum Nikon lens compatibility back to 1977 with a film camera then you need to save up for an F100 or F6. ☺
Shutter
I have never had a blurry shot from my N75. I don’t have particularly steady hands but even with non-VR lenses the shutter is smooth and quiet. There is a slight lag depending on how the focus options are set up. Some choices require the camera to calculate the closest focus point from the five available, which is a little slow.
With the leisurely shutter you need to hold steady as you click and wait until after the viewfinder blackout ends. I later discovered that using Center Subject Priority with a re-configured AE-L button eliminates any delay.
A top speed of 1/2000 is enough for most action photography but may be limiting if you want to use large apertures in sunlight. For example, a fast lens and Portra 800 at E.I. 400 will often need 1/8000 for optimum exposure. Happily, the N75 will still fire even if it registers an overexposure and the latitude of print film will cover the extra light. These shots are two or three stops overexposed.

Viewfinder
My only concern about the N75 is the quality of the viewfinder. Then again, no Nikon camera with a rectangular viewfinder has top quality internal optics. Although it is fitted with a diopter adjustment, the viewfinder is small and not really good enough for manual focusing, or even evaluating the success of auto-focus lenses. Trying to fine tune focus with any lens is an exercise in futility. I even tried the outstanding Voigtlander 40mm f/2, with dismal results.
A manual focus switch is provided on the front of the camera and the viewfinder has a focus confirmation light but in my judgement this is wishful thinking on the part of the Nikon engineers. If you prefer to take control and focus manually with auto-focus lenses then the larger, more powerful N80 is a better choice.
Custom Setting Menu
Set the motor drive lever to CSM then use the thumb wheel and exposure compensation button. These are my choices, mostly altered from the factory defaults.
- 1–1 Autofocus success beep is disabled.
- 2–0 Viewfinder battery warning is displayed.
- 3–1 Bracketing order: low, metered, over.
- 4–2 Active focus sensor always lit in red.
- 5–1 Partial shutter press locks exposure.
- 6–2 AE-L button now works as a focus lock, not as an exposure lock.
- 7–0 Centre-weighted metering if AE-L button used as exposure lock.
- 8–5 Five second delay before meter off.
- 9–2 Self-timer set to two seconds. Works as a pseudo mirror up.
- 10–0 Remote control delay. I don’t use this.
- 11–1 Top LCD screen lights automatically.
- 12–1 Focus assist light off. Speeds up focus acquisition in good light.
Further Reading
- Read the Brochure or Data Sheet or Manual.
- Photography in Malaysia N75 specifications.
- Thom Hogan’s N75 Review is, as always, thoughtful and relevant. It includes a comparison to the N80.
- Ken Rockwell’s N75 Review includes a Custom Settings reference chart.
- Imaging Pixel’s review includes a good introductory video.
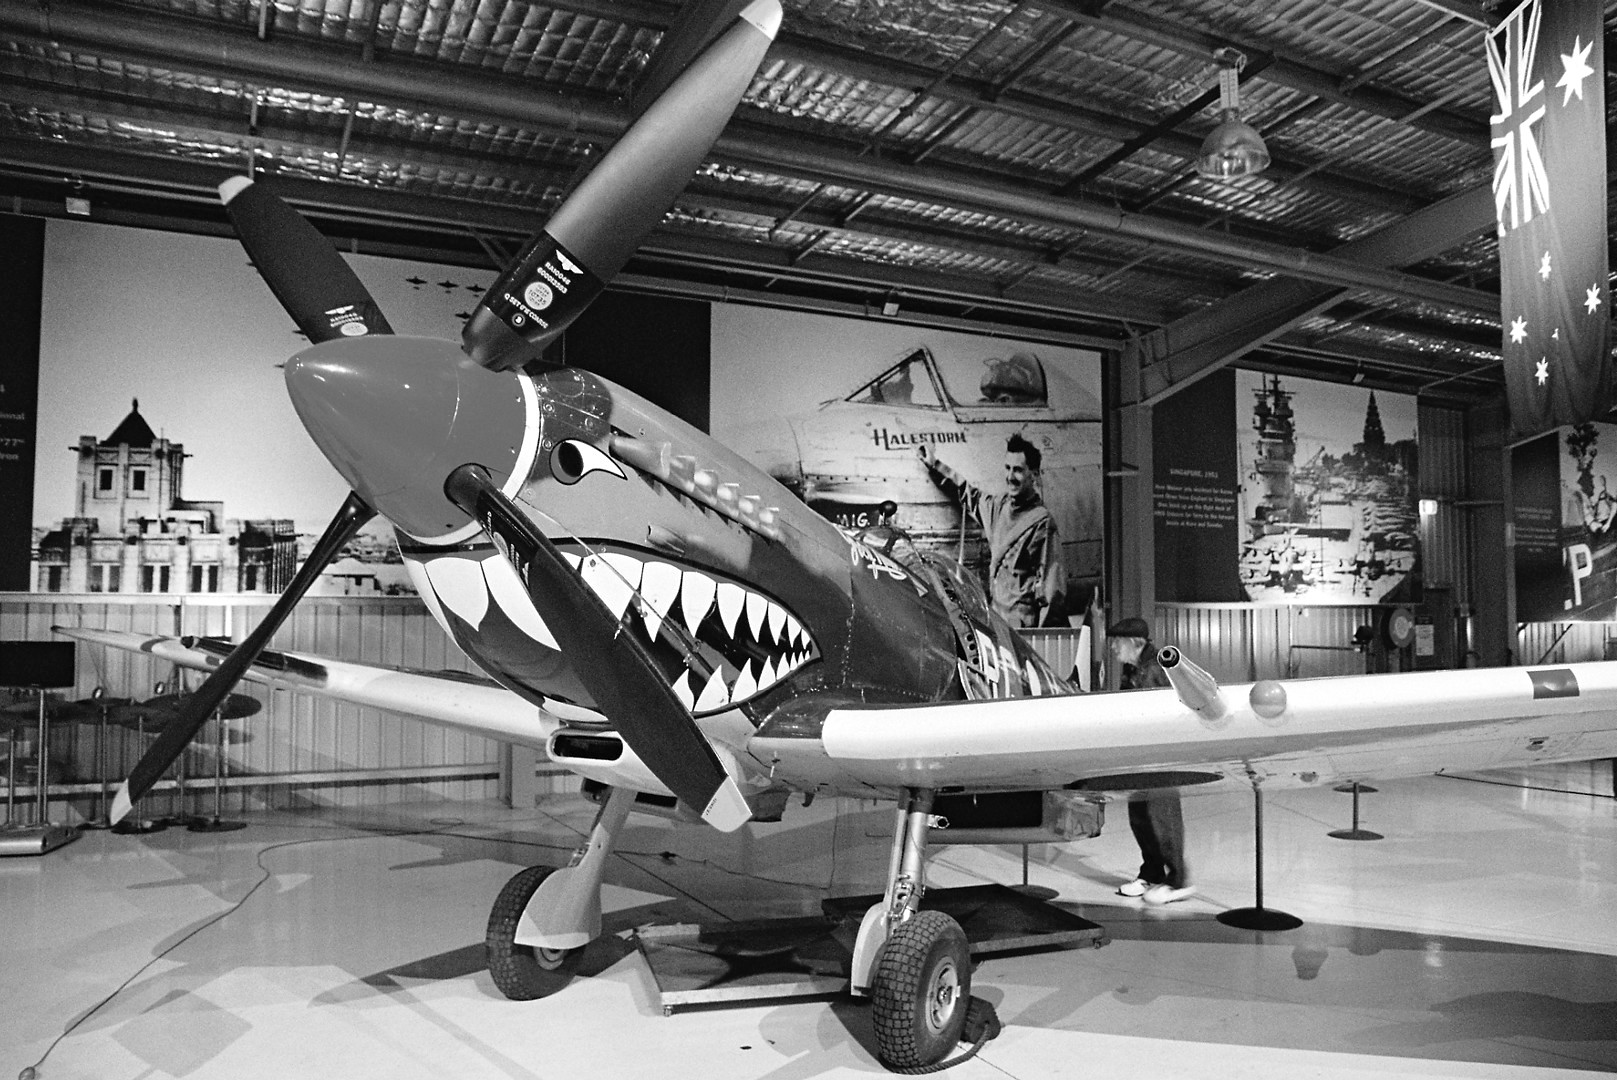
Nikon F3 Review
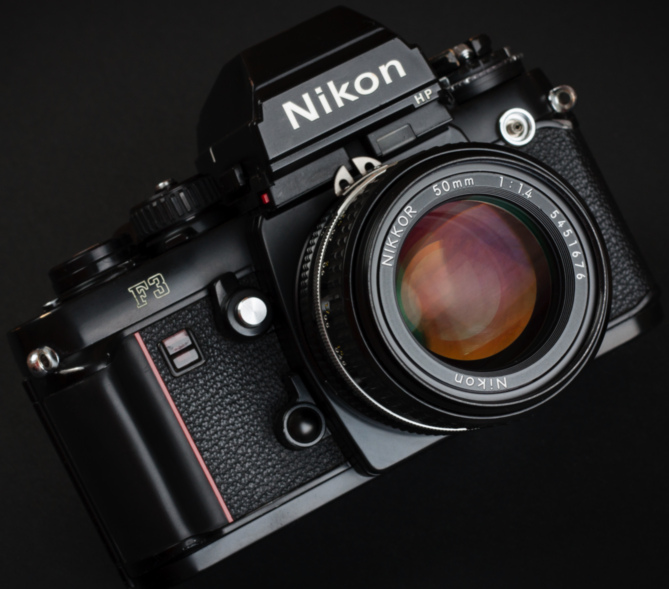 I generally use the F3 when I can only carry a single camera or as a film partner for the D6. The elegant simplicity of the F3 gives me a welcome break from the deep complexities of top level DSLRs.
Despite a tiny design flaw left unmodified for the entire production lifetime this is a sensational camera. In a world where photographers need to wade through thick manuals and master hundreds of intersecting menu options it is liberating to use a body with so few controls.
Getting started
Loading the F3 is somewhat mysterious for first-time film users but help is available.
Winding the film a couple of times until reaching the first frame is vital. The viewfinder will read a fixed 1/80 shutter speed until then. This means the F3 cannot be test run without film since the meter reading will not reflect aperture changes.
The film ASA meter also needs to be set. I use settings that all overexpose slightly. Using a lower Exposure Index improves the look of colour print films.
I find it easier to match the ASA dial to the number on the film box then use exposure compensation. That way I can see my film setting on the top of the camera, along with the aperture and shutter speed. So far I have used the following exposure compensation setting on the F3.
| Box | Comp. | E.I. | |
| Portra | 800 | +1.0 | 400 |
| Portra | 400 | +1.0 | 200 |
| Portra | 160 | +0.3 | 125 |
| Ektar | 100 | +0.3 | 80 |
| XP2 | 400 | +1.0 | 200 |
In the field
In my view the F3 is an ideal tool for outdoor photography of mostly static subjects in good light. My shooting method is simple:
- Imagine the photo I want to create.
- Select a suitable lens and aperture.
- Move around, experiment with framing.
- Focus, hold breath and squeeze the shutter.
That’s it. No impenetrable menus, no buttons and control wheels, no complex hard-to-read LCD screens, no incorrectly set focus modes, just pure photography. Bliss!
While there are undoubtedly subjects that can be approached more realistically on digital such as birds, low-light action and macro, I feel much more relaxed and able to function calmly with my F3 where film still works well — landscapes, architecture, holiday destinations, railways, street photography and outdoor festivals.
I normally use the tiny Voigtlander 40mm f/2. The slightly wider view suits me better than the standard 50mm. This is a manual focus Ai-P lens that works well on all Nikons, film and digital alike.
I also carry a 20mm f/2.8 with a 24mm f/2.8 or 28mm f/2.8. I replaced a very old 70-210mm with an 85mm f/1.8 and a 180mm f/2.8.
Sometimes I take a 28-105mm f/3.5-4.5 alone as a walk-around lens. This is good at f/8 with a little sharpening in Apple Preview. Still, I may upgrade to a 28-70mm f/2.8 AF-S. That lens has an aperture ring so it will work on film and digital and is at least one stop faster. At 900g (2lb) it would be a heavy but top quality walk-around lens for any of my cameras: auto-focus on the N75, F6 and D6; manual focus on the F3.
With no facility to activate vibration reduction on the F3 I need all the film speed I can get, despite the very smooth shutter release. My handholding ability is poor, somewhere from two to three times the focal length. For optimum results with a 40mm lens I need a shutter speed of 1/125 and at least 1/500 at 180mm.
Portra 800 and XP2 Super are both excellent if overexposed a little. At a pinch you can digitally process the Portra 800 for viable B&W images, although I prefer the texture and tonal graduation of chromogenic films (R.I.P. Kodak BW400CN).
In very bright light the F3 shutter maxes out at 1/2000 with wide apertures but both of my usual film choices have immense overexposure latitude. The top shutter speed is not an issue.
I generally let the camera expose front lit scenes using the Aperture Preferred mode. For backlit subjects I take a reading from an area that does not include the sky, then hold the exposure with the Auto-Exposure Lock on the front of the camera. If the light is unchanging I sometimes set the camera manually.
For me, the most satisfying part of film photography is not having to think about dozens of intersecting menu items, with the distinct possibility I may have changed something yesterday and forgotten about it. This feeling of unease pervades all my digital work.
When I use the F3 I can relax and think only about the image. I also experience this feeling of calm and increased creativity (such as it is!) when using an FE2, a camera I also highly recommend.
I don’t lose shots due to chimping to assess the image, stressing over unrecoverable highlights, changing menus for new situations, misunderstanding ever more inscrutable focus tracking functions, or panicking about battery life. These are all concerns when I shoot my D500 or D6, despite excellent results in high-speed action and bird photogrpahy.
Low light use
The two weakest areas of the F3 design are the poorly designed viewfinder LCD for night work and the need to mount the SB-12 flash on an adapter on top of the film rewind lever.
Enlarging the tiny red button on the side of the viewfinder should have been done early in the product development. Turning on the finder light requires the user to press the very small, slippery button with a finger nail. Really, how hard could it have been? This is a big disappointment in a camera that was in production for 21 years.
In manual mode the F3 viewfinder readout is so difficult to read in low light it is simply not worth the effort. Happily, the aperture-preferred automatic metering is quite excellent. The 80/20 centre-weighted metering works very well. In fading light I trust the camera meter to do the right thing rather than try to read the LCD screen.
The flash operation is also problematic. While it is true that when the F3 was released in 1980 Nikon had not had a great deal of experience with electronic flash, the lack of a hot shoe was an unexpected decision.
My 1976 Olympus OM2 had a hot shoe with TTL metering, so the idea was certainly not a novel one. On a positive note the F3 side-mounted flash was TTL enabled with off-the-film exposure control, a big step forward for Nikon at the time.
Photography Samples
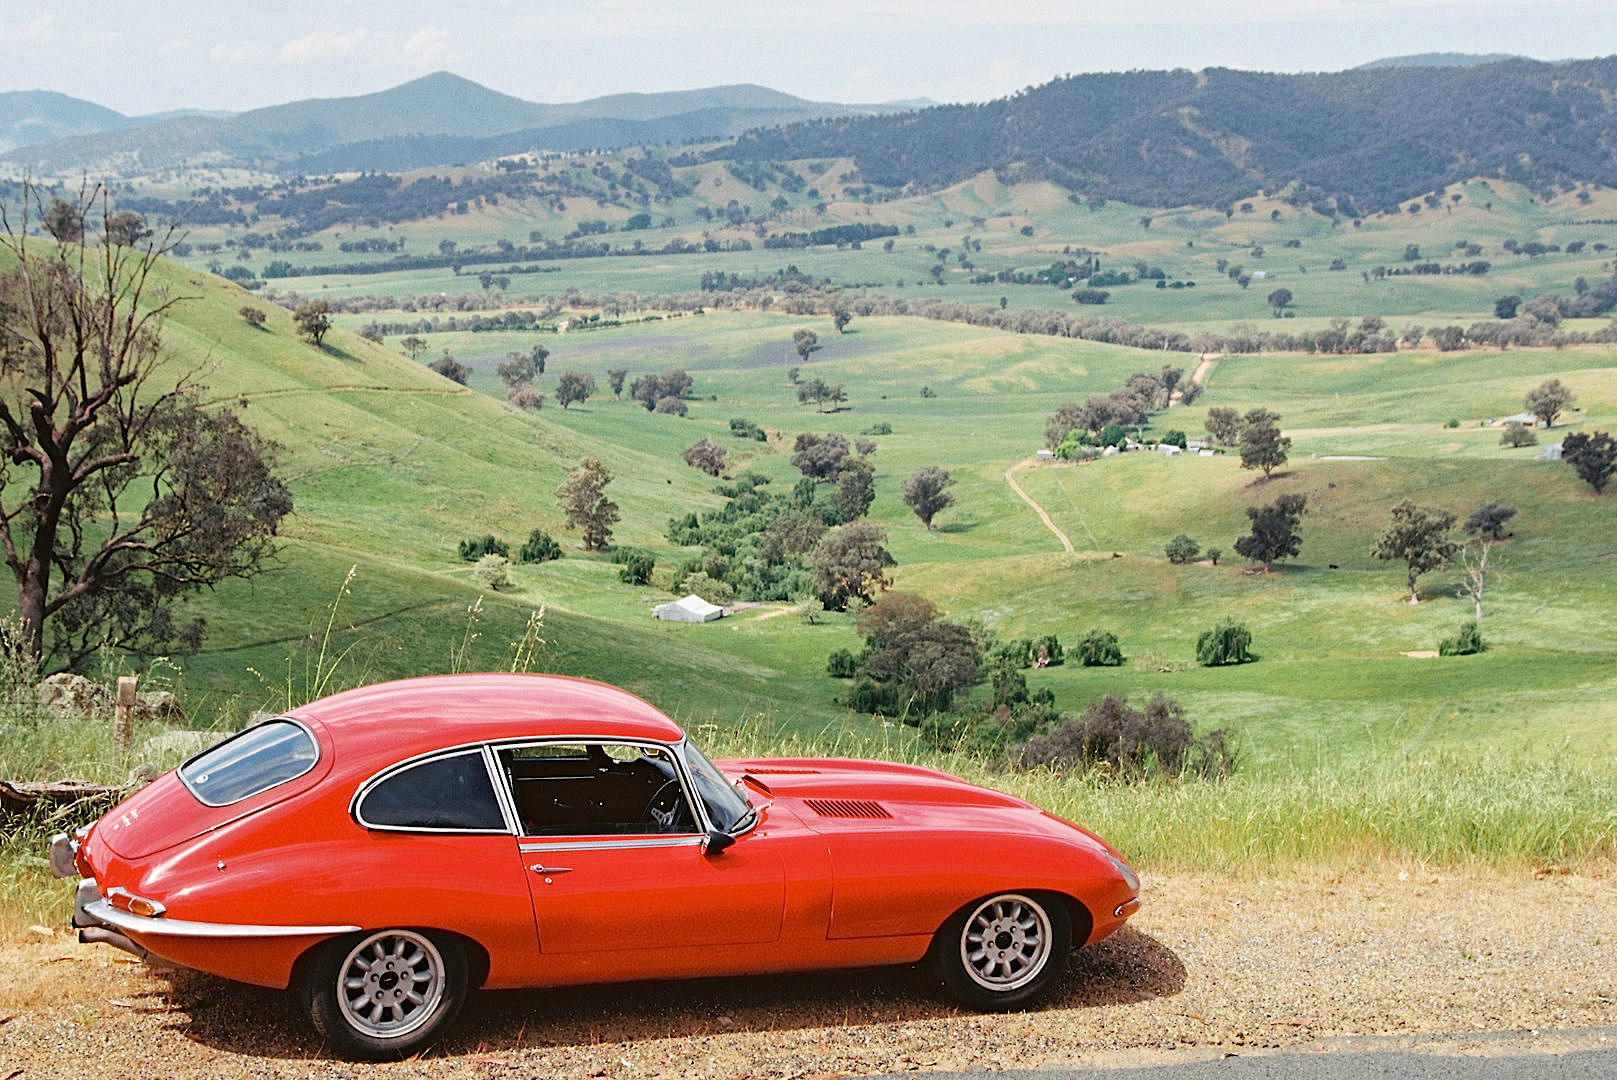
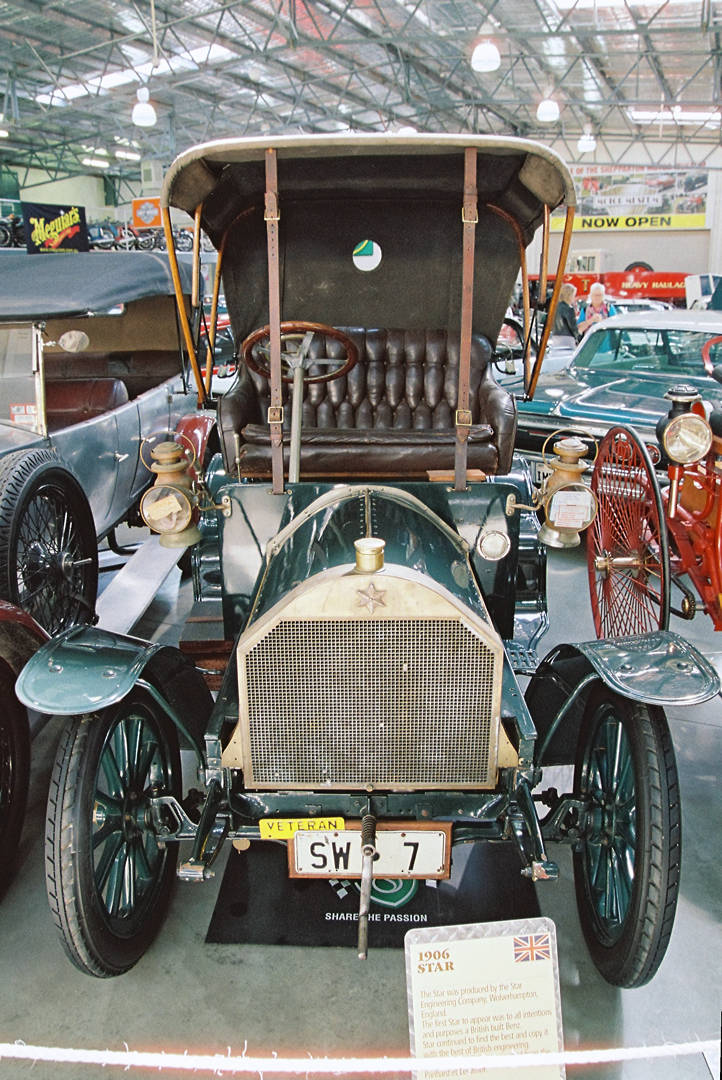
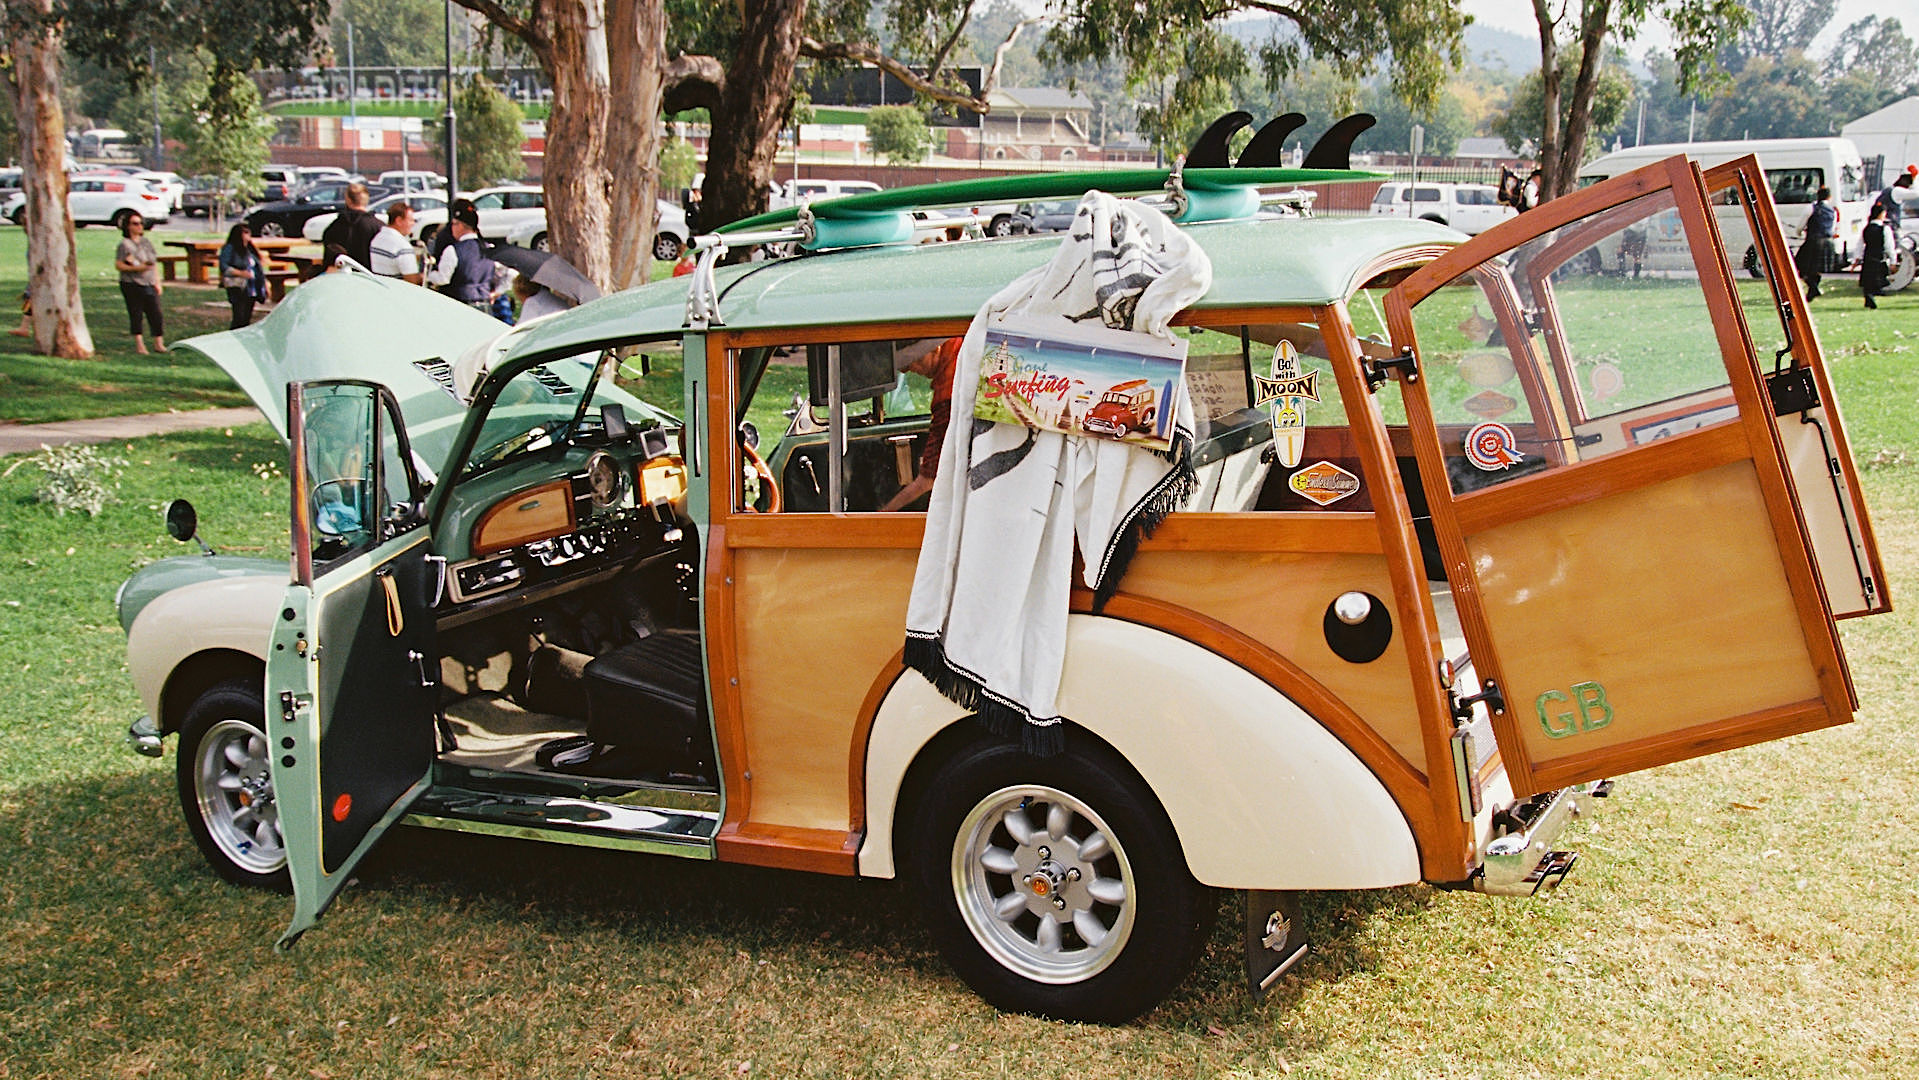
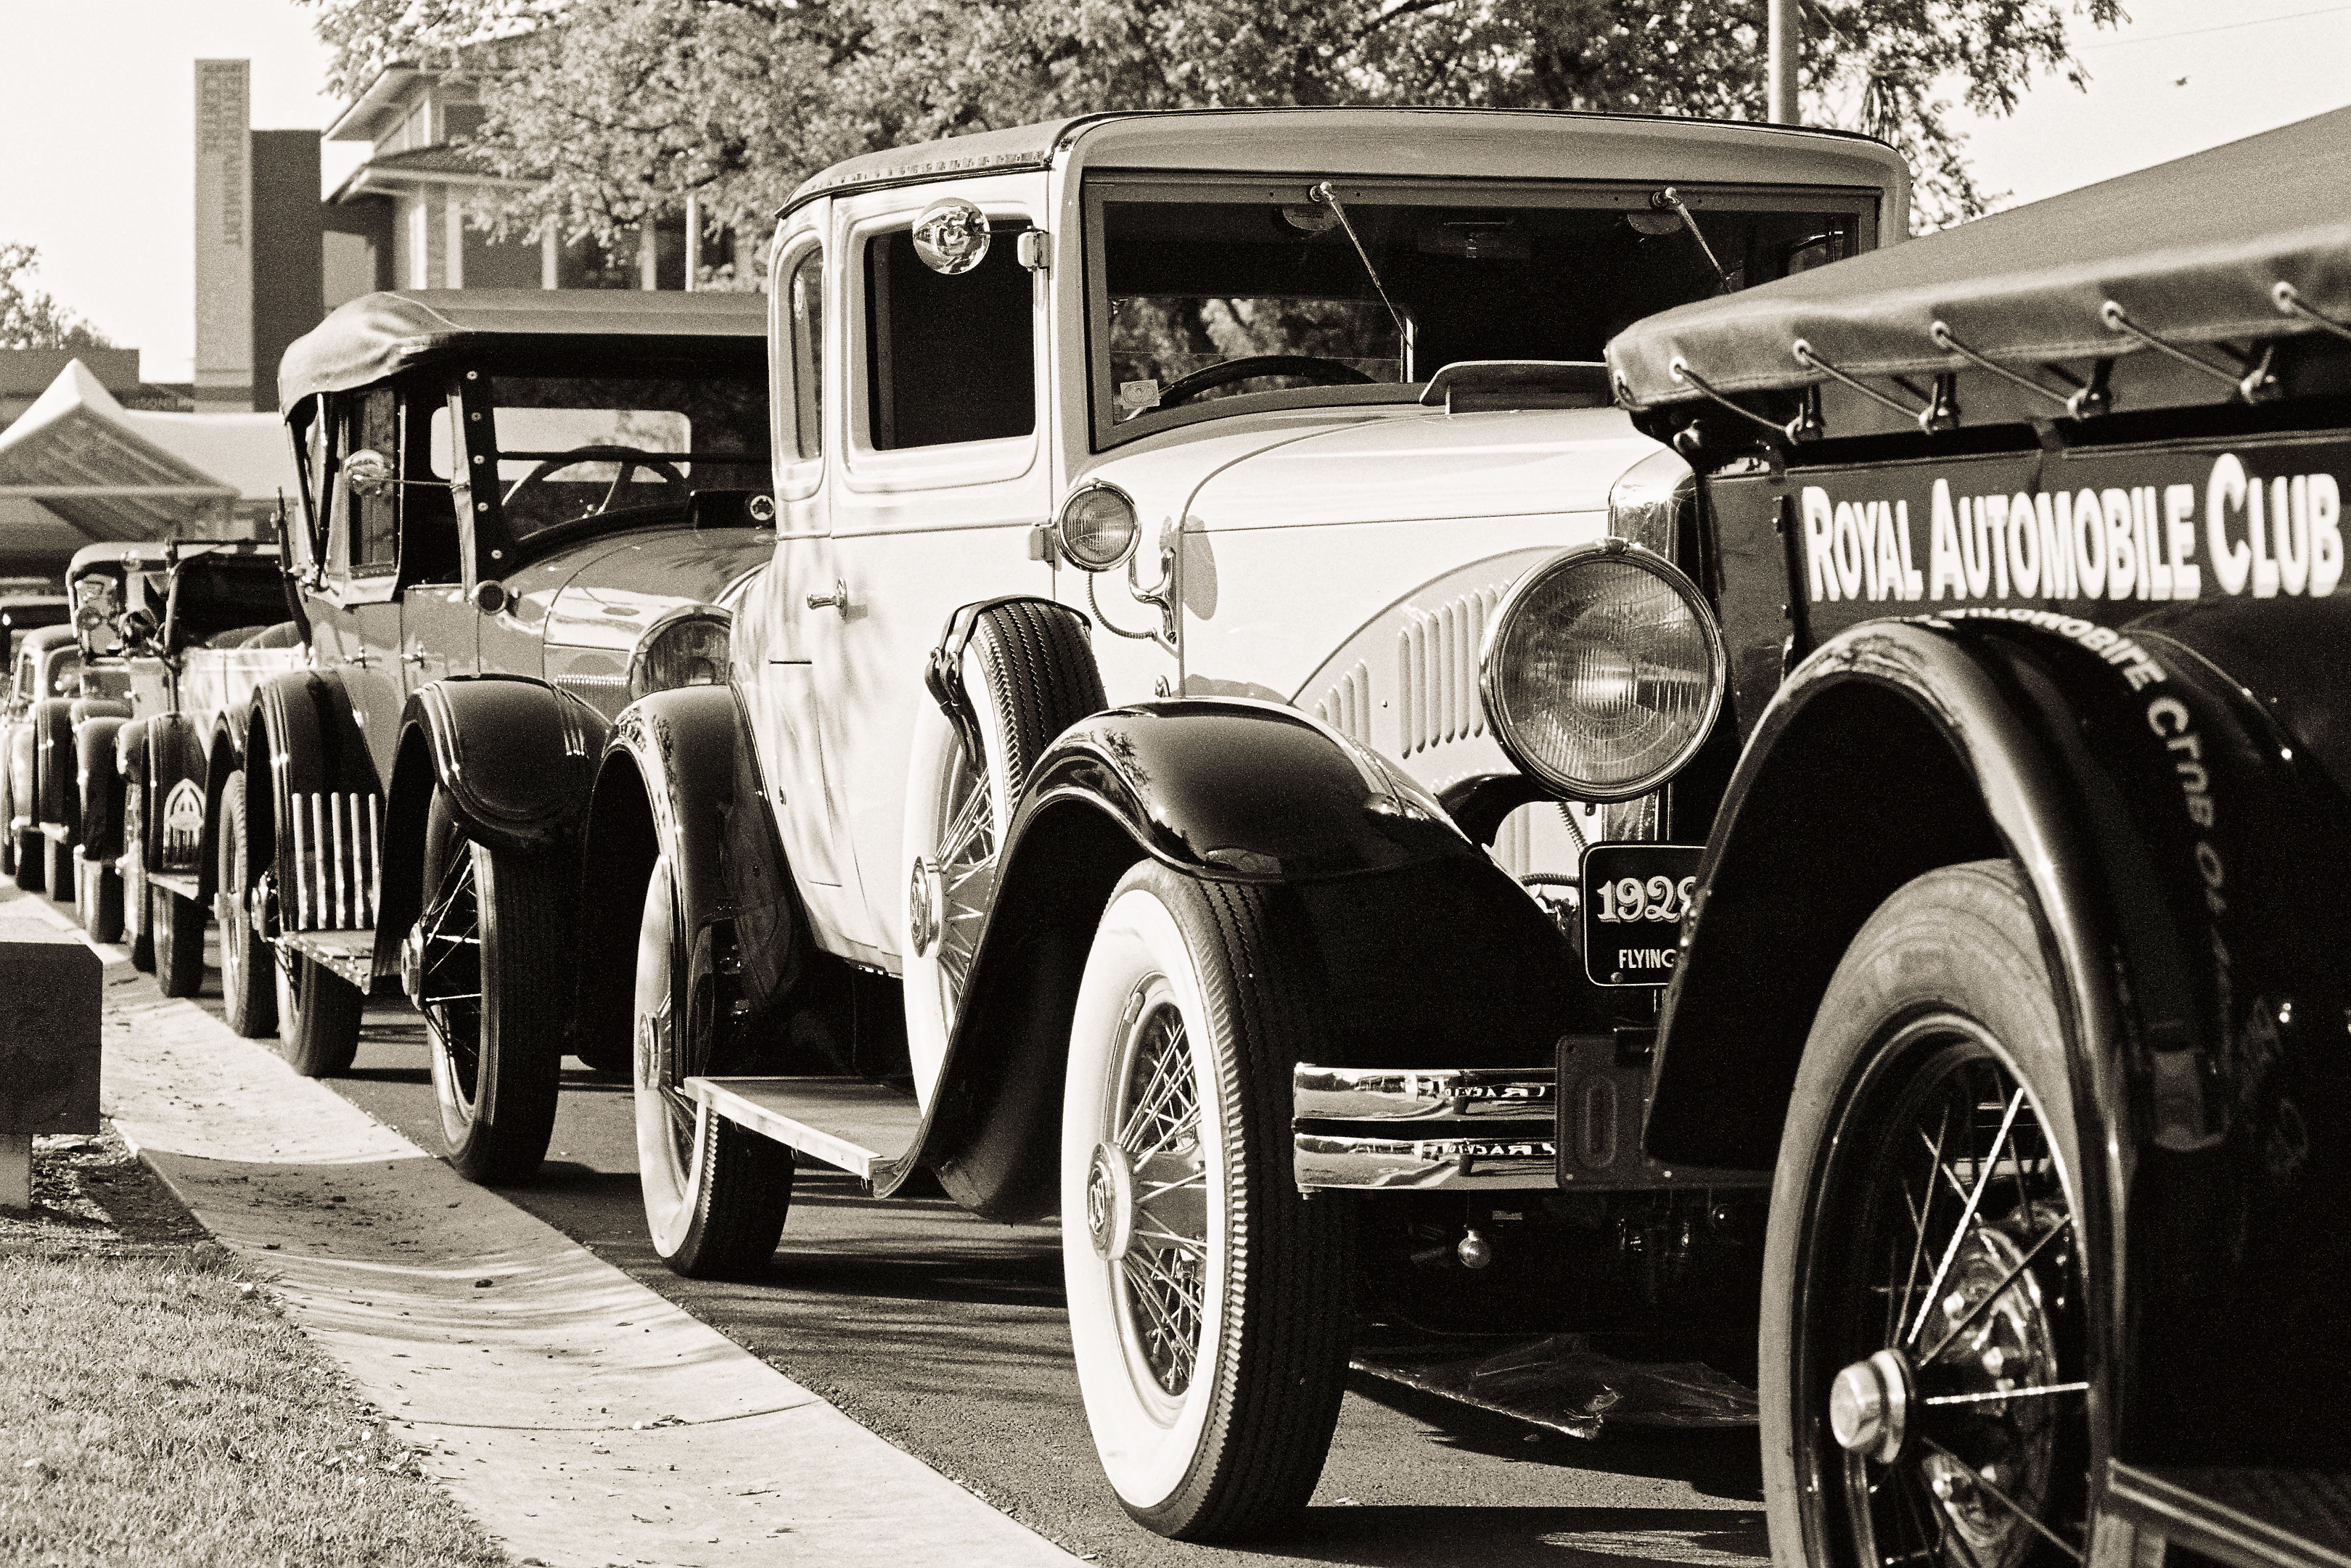
My F3 is strictly a sunshine choice where it has proven to be an outstanding camera for static or slow moving subjects. My first F3 trip was to a vintage car show. Please read this blog entry as it covers some handling characteristics.
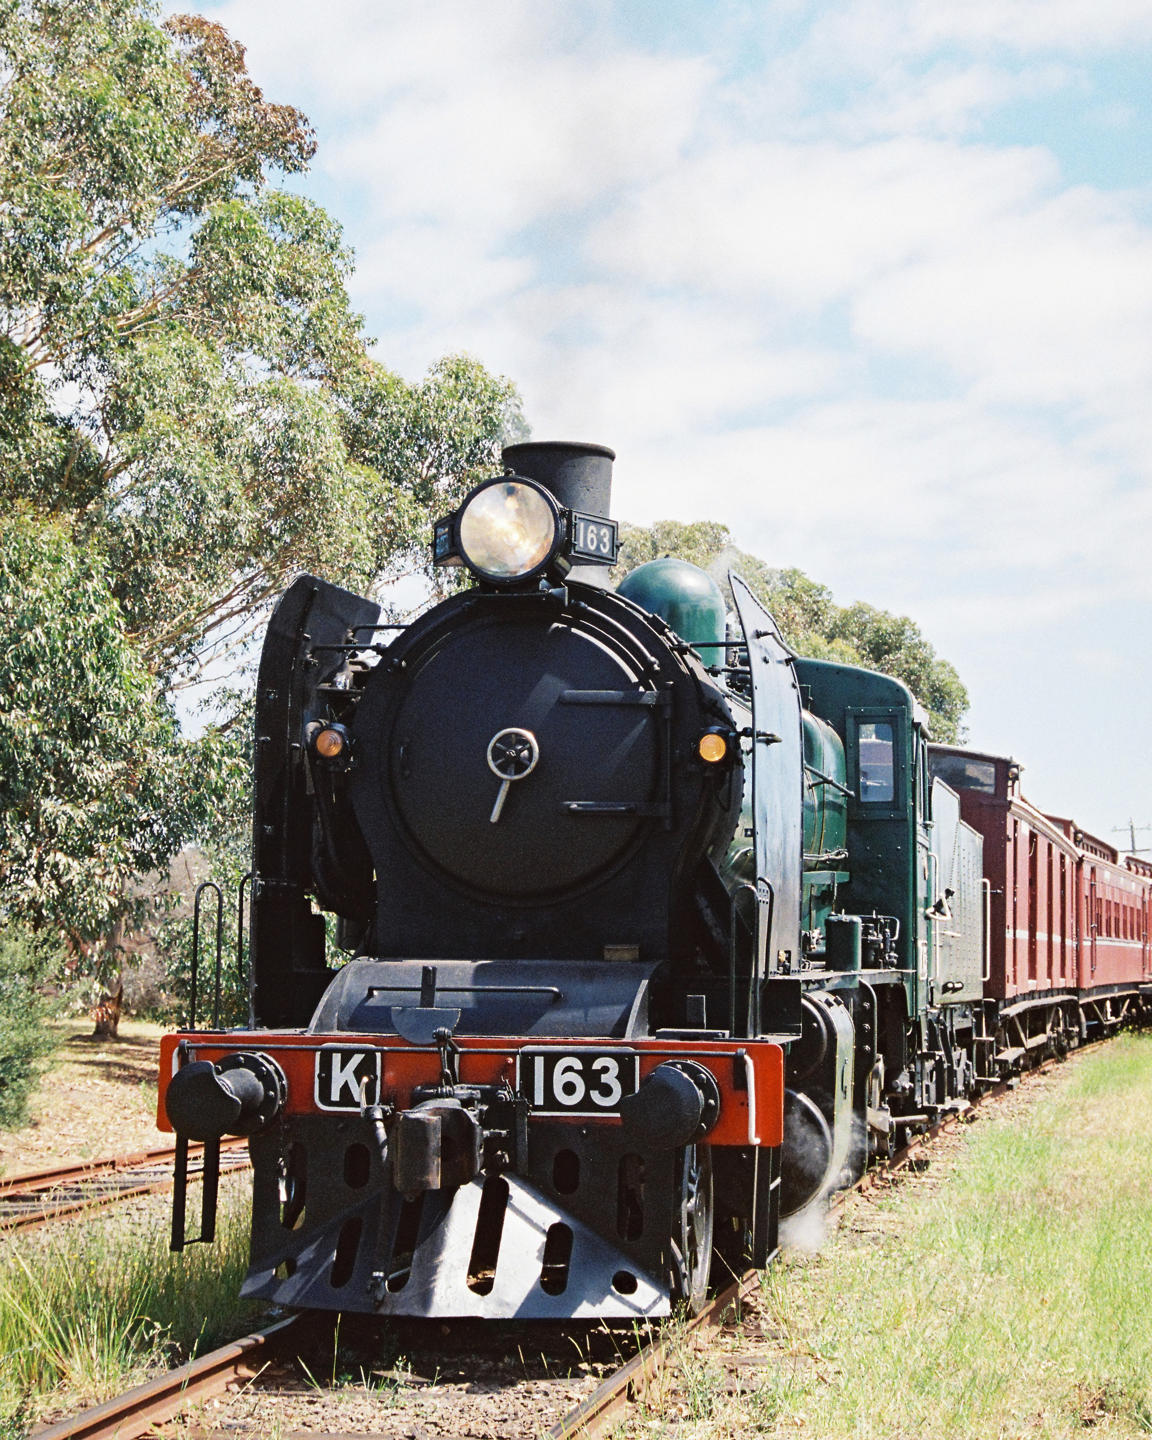
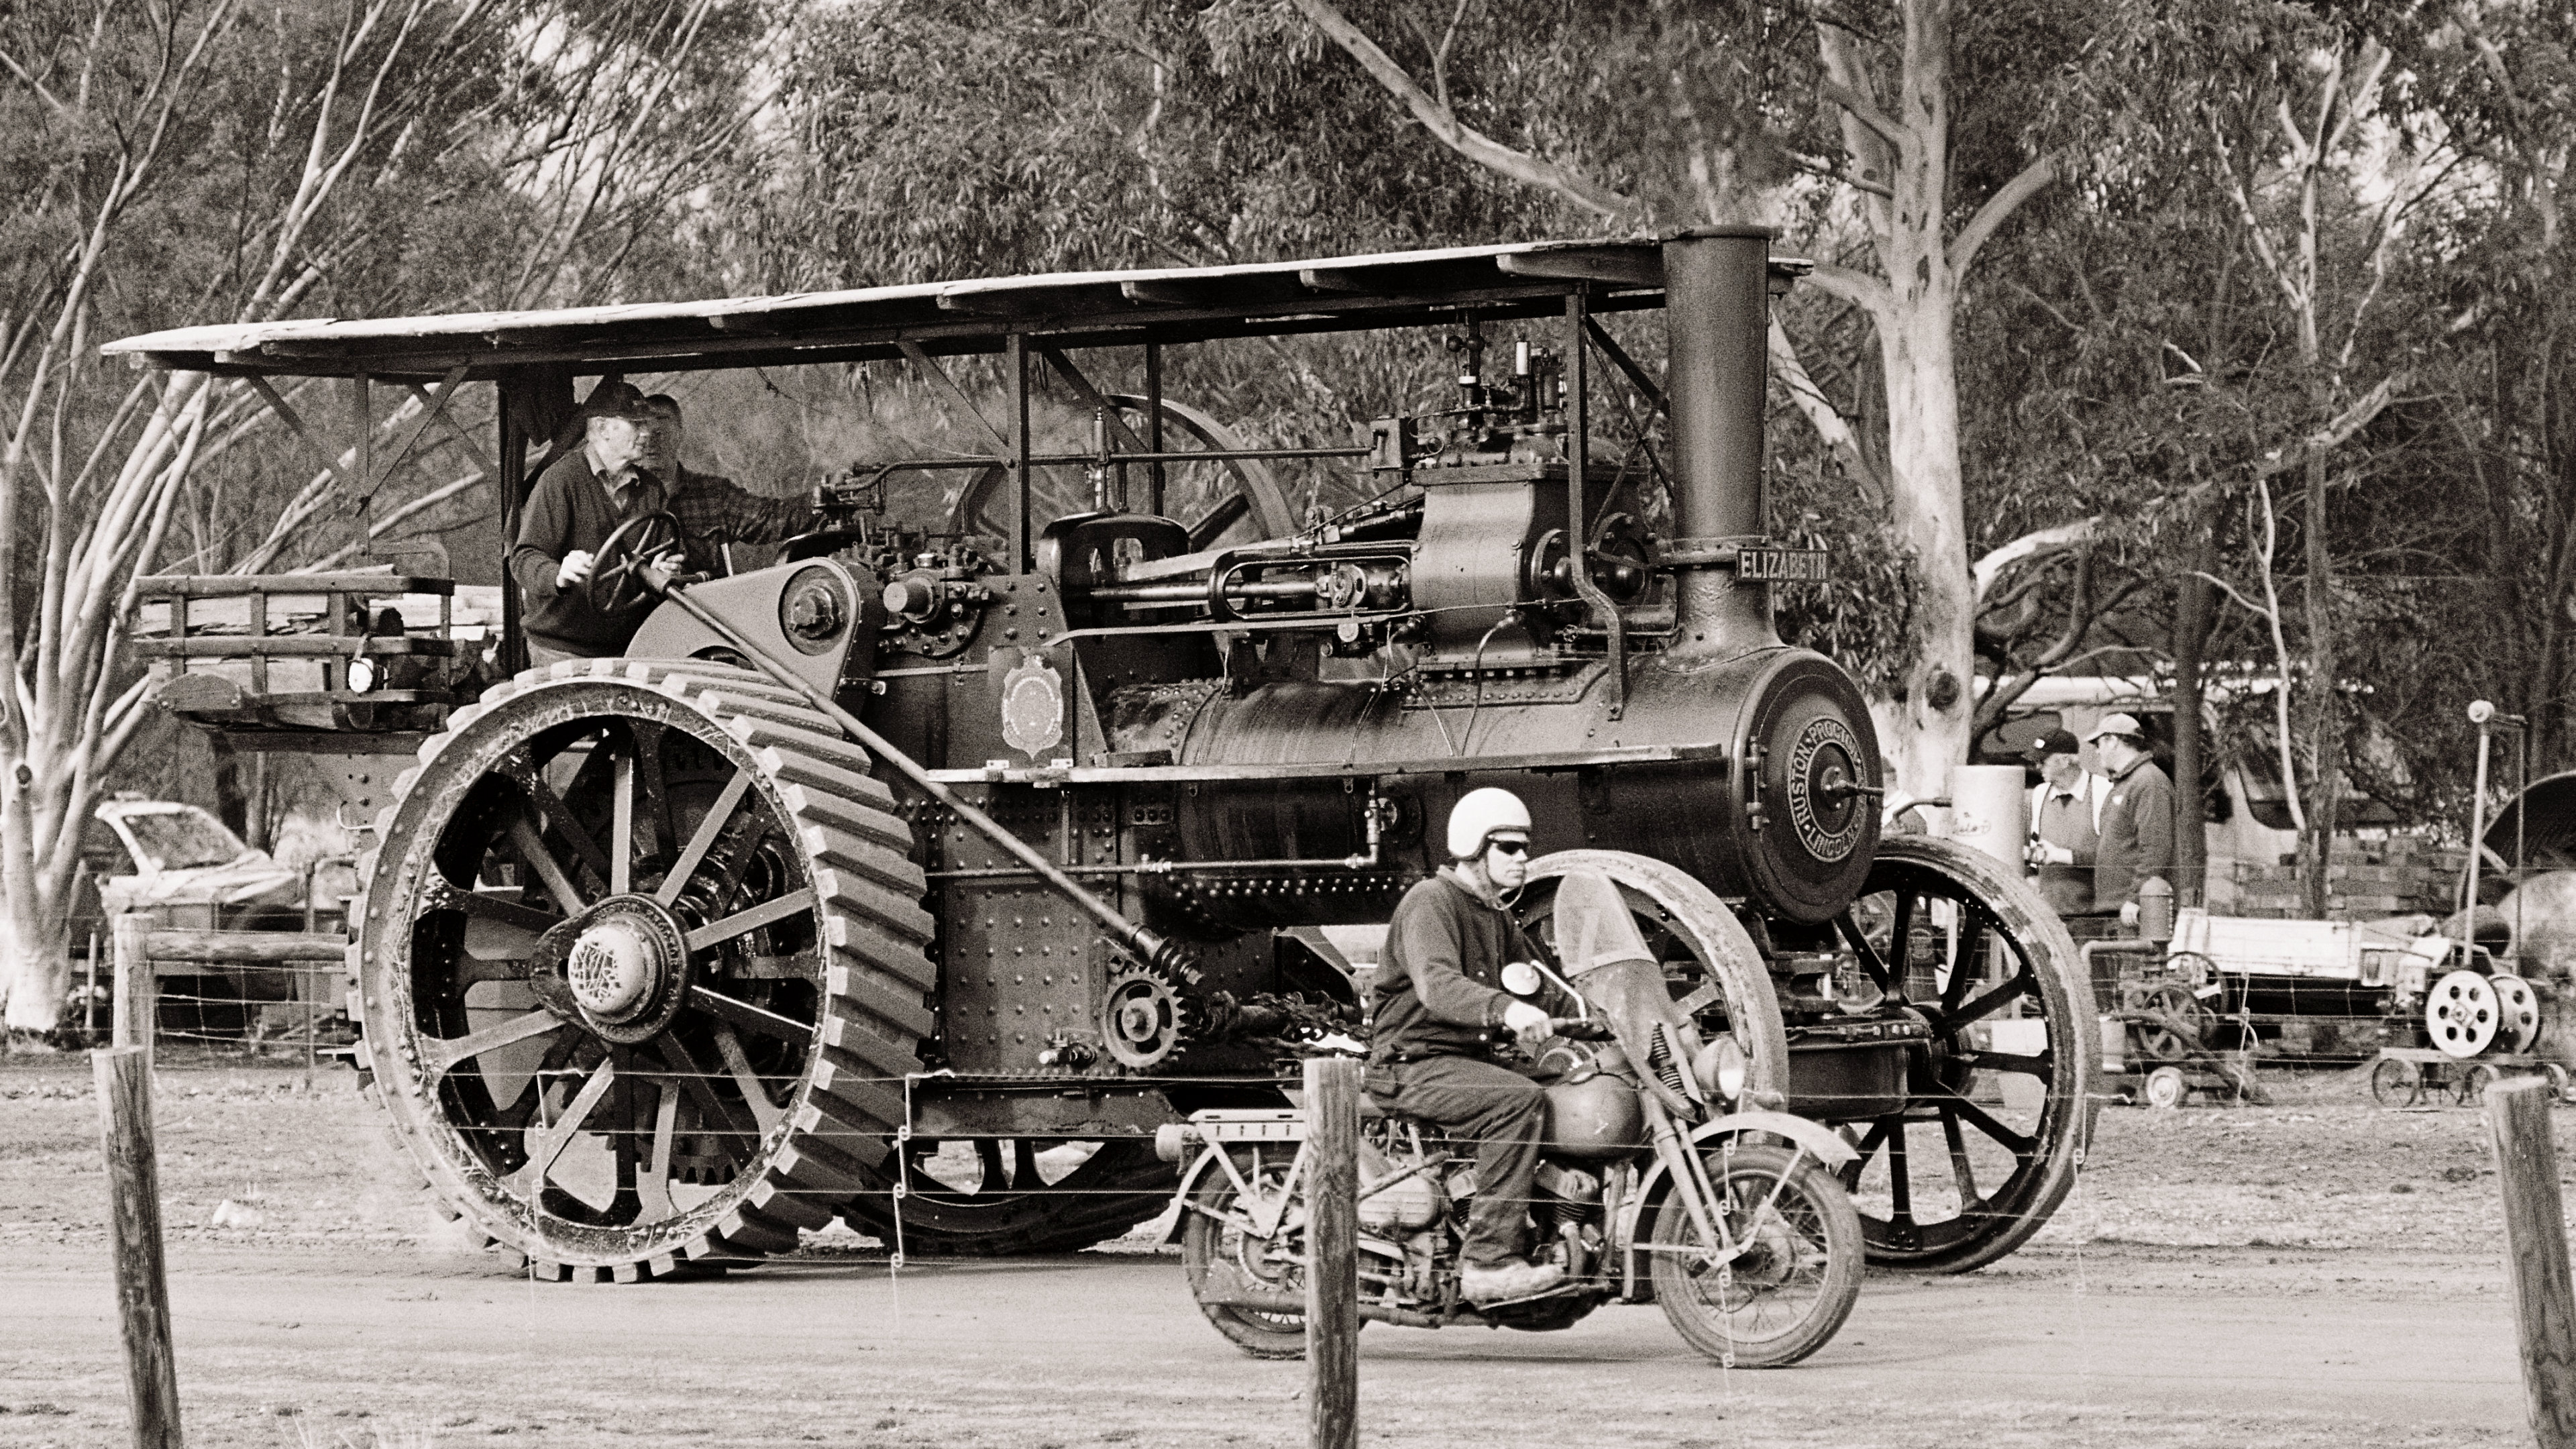
Another F3 trip was to the Echuca Steam & Horse Festival. Again the F3 was a real joy to use. Quiet, simple to operate and flawless in its automatic exposure control.
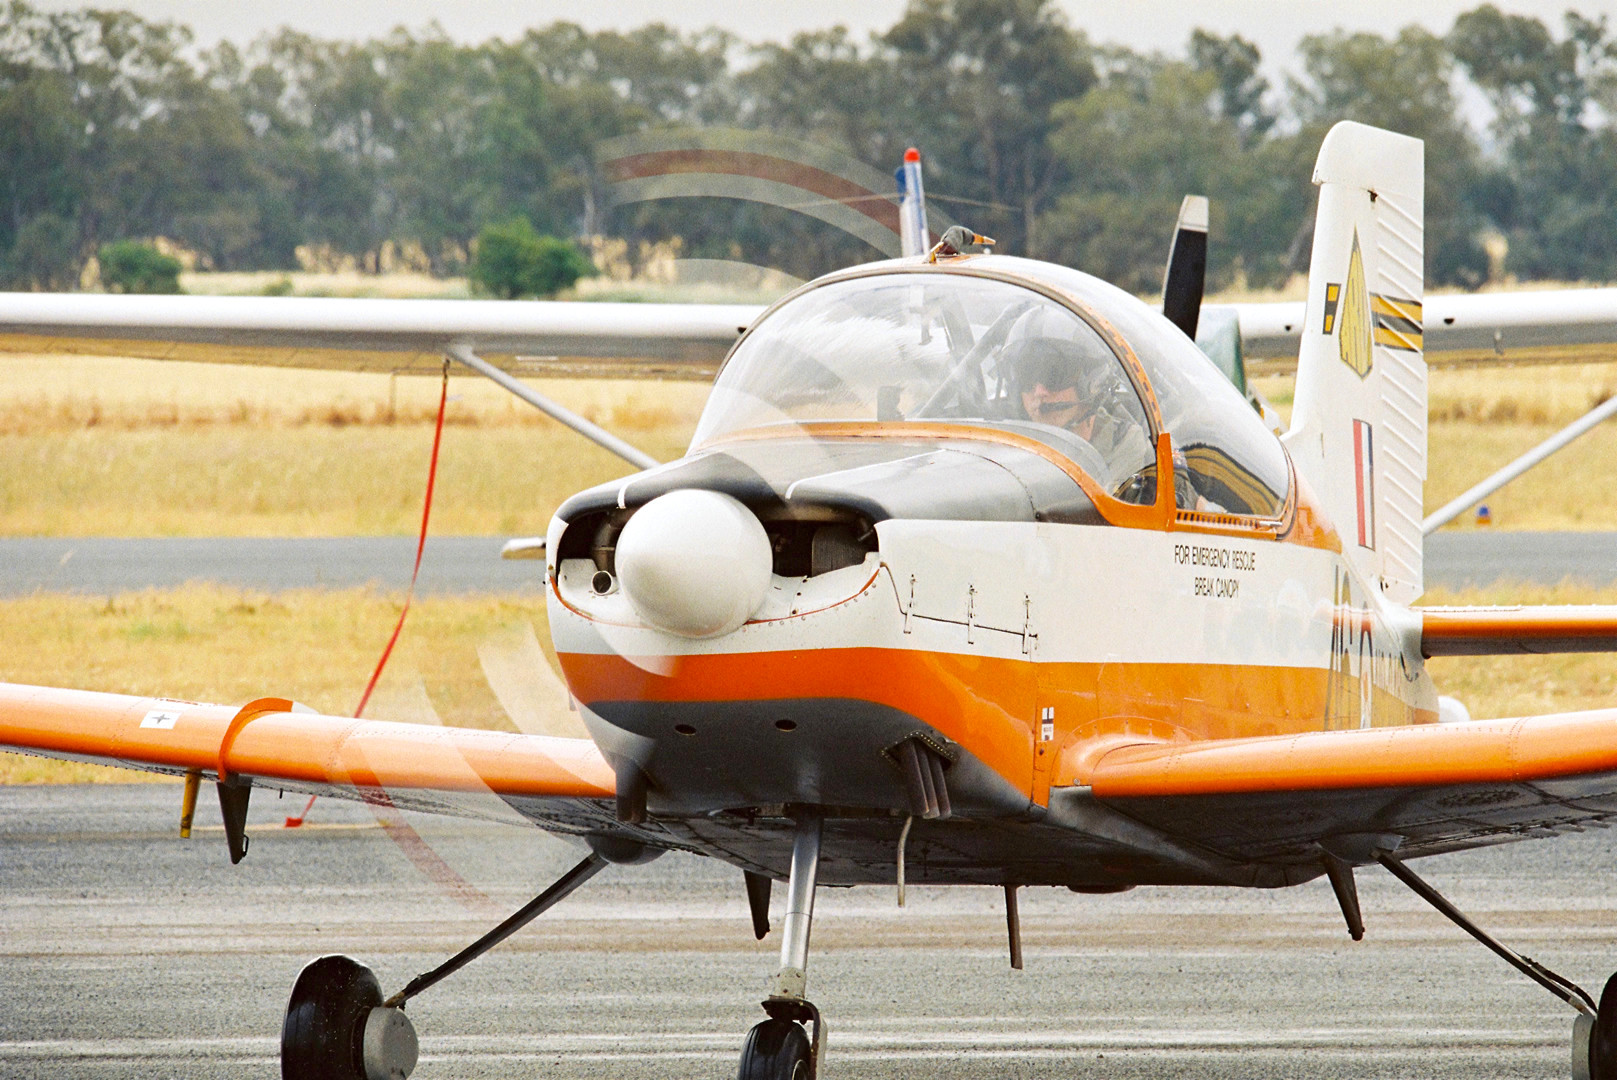
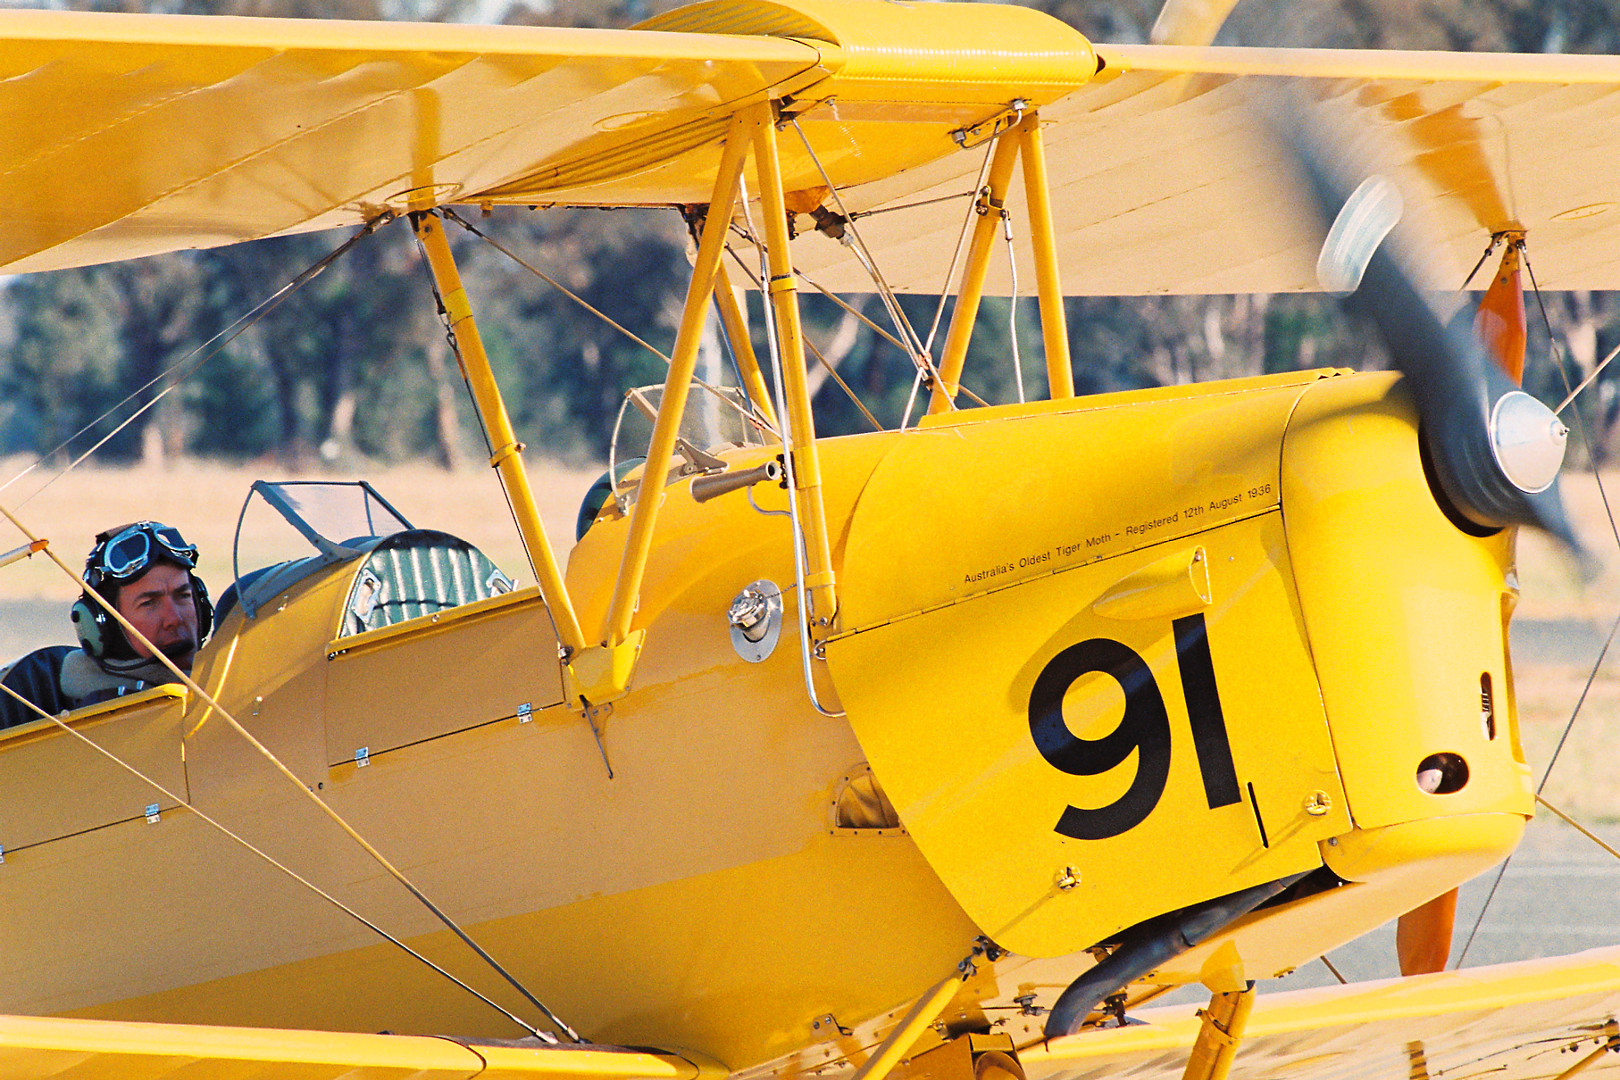
The Tyabb Airshow was a colourful spectacle and a most enjoyable day out. I used the F3 with Portra 800 and the 28-105mm f/3.5-4.5D for the ground display. This zoom is fine on sunny days but really needs an upgrade. A 28-70mm f/2.8 AF-S would have been better.
Other Manual Focus Lenses
Short story — if it is a Nikon F mount lens with an aperture ring then it will work on an F3.
If you are a manual focus shooter, perhaps with other Nikons such as the FE2 or FM3a then AI-S lens are the best choice. They are at least as sharp as the later AF-D versions and often have wider focus rings and a longer focus throw. That is, you have to turn them further to focus, so accuracy with split prism screens is easier to achieve.
These classic Nikon designs are mostly soft at full aperture but sharpen up quickly when you close down a stop or two, revealing a wonderful depth of focus and clarity.
AI-S lenses have been manufactured since 1982. They are easily found on eBay in as-new condition, mainly from Japan and Hong Kong. Several AI-S designs may still be available new, including: 20mm f/2.8, 24mm f/2.8, 28mm f/2.8, 35mm f/1.4, 50mm f/1.2, 50mm f/1.4, 55mm f/2.8 Macro and 105mm f/2.8 Macro.
Other classics available on the used market include: 85mm f/1.4, 105mm f/2.5, 135mm f/2.8, 180mm f/2.8 and 80-200mm f/4.5.
Voigtlander make a stunning 40mm f/2 manual focus lens (full review below). Samyang (aka Rockinon or Bower) also make a range of manual lenses suitable for Nikon cameras.
Ken Rockwell has the most detailed listing of Nikon manual focus lenses. If the image of the lens shows an aperture ring then it will work on an F3.
F3 with Auto-Focus Lenses
If want to share lenses with autofocus film or digital bodies then the AF-D series is the most compatible. The F3 viewfinder focus area darkens with f/5.6 lenses, so some longer zooms are not useful.
AF-D lenses are a “screwdriver” design, meaning autofocus operates from a physical linkage to the camera body. Smaller digital bodies such as the D3xxx and D5xxx models won’t work with AF-D lenses. On the F3 they can be used in manual focus mode.
Higher level digital bodies such as the D7xxx, D500, Df, D6xx, D7xx, D8xx and all single digit professional cameras reaching back to the D1 all work with AF-D lenses. The Df has the greatest lens compatibility of any Nikon camera ever made enabling you to experiment with lenses built from 1959 to today, including the new AF-P and E designs.
Current AF-D lenses include auto-focus equivalents of most Ai-S primes. Historic zooms include the 28-105mm f/3.5-4.5D and 80-200 f/2.8D.
Further Reading
- Read the F3 brochure and F3 manual
- Read Modern Photography’s review
- Read Photography in Malasia’s article.
- Nikon’s official Evolution of electronic cameras
Nikon F6 Review
 I like the experience of film shooting and the quality of the prints. When I downloaded RAW files from early digital bodies the results were not how I wanted my photos to appear. The D3 was a brilliant body but the RAW files still needed a lot of massaging to look as I wished.
None of my JPEGs had the quality I expected. RAW files required complex software and a fast computer. I spent way too much time editing instead of shooting.
I tried DxO Filmpack and my eyes were opened to the range of styles possible “back in the day” when dozens of emulsions were available.
Film emulators are common. Fujifilm have in-camera film presets. DxO FilmPack, Exposure Software, VSCO and Mastin Labs offer historic styles. The web has endless articles on how to get a film look from your RAW files.
Given enough pixels of sufficient dynamic range (think Nikon D850), software can mimic many historic films. One of my favourites is Autochrome. Great photos don’t need flawless reality! Convincing simulations of Autochrome are rare.
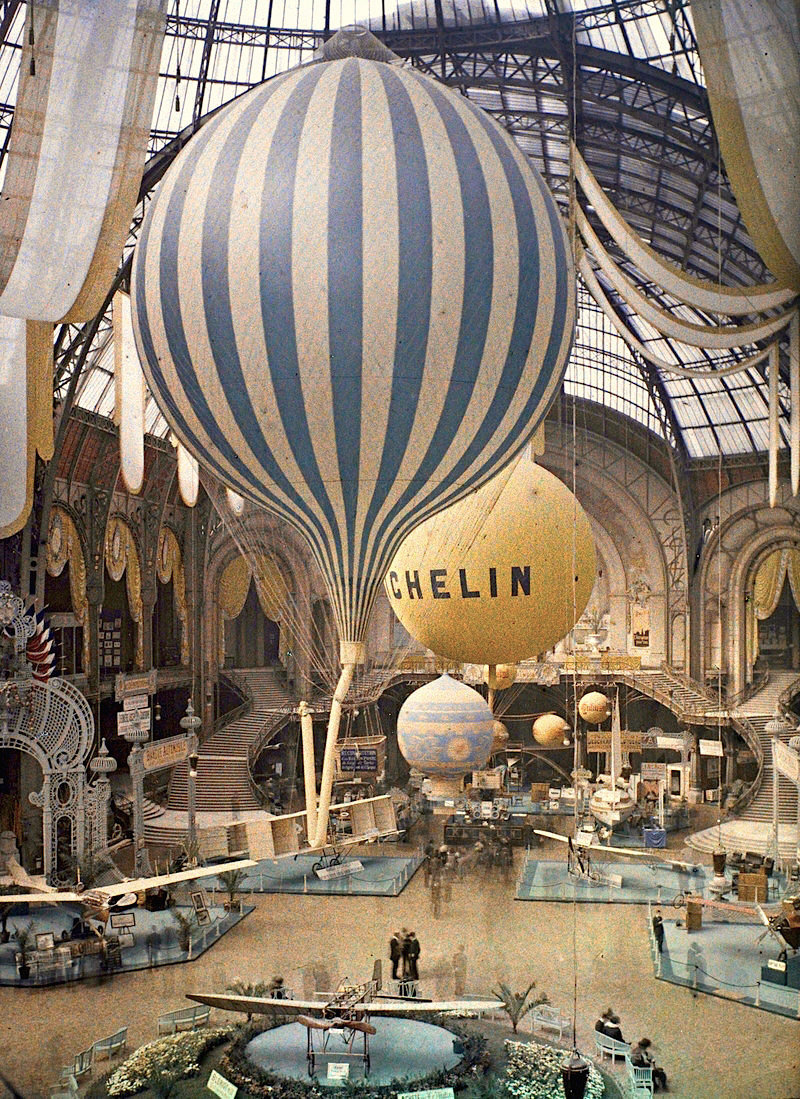 |
Autochrome from 1909. More |
I don’t see much point in buying yet another digital camera and learning more software skills when Kodak and Fujifilm still make colour film, at least for the type of outdoor photography I do.
The most enjoyable camera I ever used was a Nikon FE2, a true film classic. The huge viewfinder was ideal for fast manual focus lenses and the aperture preferred metering was excellent.
The experience of film photography is quite different to digital. The Nikon Df tried to recreate an FM3A feel combined with a top low-light sensor. The body design didn’t quite work for me although the Df’s indoor capability is sensational.
I purchased an F75 for $50 and from the first CD of high-res scans I knew I had found what I wanted. Good film scans require almost zero additional processing. I usually just straighten and crop. The film chemistry itself takes care of dynamic range, highlight details, colour saturation, contrast and white balance. Film just works!
Film has a natural tonal range and surface texture that requires no digital trickery other than thoughtful scanning. It reacts differently, and to my eye quite beautifully, to changing light. Digital auto-white balance is not always a good thing.
I am fortunate to live near Albury Foto Supplies run by the Dallinger family since 1936. Their wonderful scanning service and enthusiastic support for my hobby helped me make the decision to switch to film.
In 2013 I began searching for a camera that handled like a DSLR but used film.
The tiny F75 is a gem with auto-focus lenses. It won’t meter or focus manual lenses. It has excellent matrix metering and a smooth shutter. A battery grip helps when hand holding long lenses but at only 1.5fps the F75 isn’t an action camera. It currently serves as my backup body since it will activate VR.
The F90x is highly competent in most respects and a good action camera but lacked VR support and matrix metering with manual lenses.
I read every article I could find then joined Nikonians to discuss technical details about film bodies. If it can be done on film then someone at Nikonians has done it.
The F100 sounded promising in Thom Hogan’s review and is excellent value. I was about to buy one when I discovered an interview with the F6 designer, now on John Crane’s website. Further reading on John’s site easily persuaded me that an F6 was in my future.
Here, in order of importance, are six reasons for my F6 purchase.
1) The look of film
I am not striving for pixel-perfect realism but for prints that feel good to view with a minimum of digital editing.
I use mostly Kodak Portra and Ektar films. All have colours and grain structure unknown in 35mm print films even ten years ago. They are different from each other but also from modern digital images.
There is something freeing about not having to stare at the back of a camera between shots! Go to any tourist trap and watch the people looking at their cameras instead of the view. 😏
I have DxO for basic editing but never use most of the tools. My scans usually look just as I imagined with nothing further to do.
I make no claims about creating art or valuable commercial images. My photography is just a hobby. I enjoy visiting new locations and recording my journeys. Time spent on a computer detracts from that.
I use Ektar or Portra 400/800 as my walk-around films. The colours are smooth and intense, perhaps more so than some digital cameras, and without risk of blown highlights.
I take single shots of front-lit scenes, knowing the 3D colour matrix meter will give me a perfect exposure. For strongly backlit scenes I use the Function button, switching to 8mm Center Weighted metering for a backup shot.
Ektar give me good results at box speed or +0.3. Any more light gives an orange colour shift, especially in faces. In flat lighting I shoot at box speed.
These images are not nuked in any way, just cropped and resized from the original 19MP scans. Ektar really looks like this. Pow!
 |
 |
48mm 1/125 f/9 +0.5 |
58mm 1/640 f/5.6 +0.5 |
Portra 800 works best for me at EI 400 for sports, bright interiors and people. I sometimes use 500 or 650 for very dark interiors to gain a little shutter speed. Colours are remarkably consistent across all light sources.
There is some grain even when using the full frame but it is unlike high ISO films of the past. This modern formula is smoother and sharper with stronger colours.
 |
48mm 1/320 f/9 +0.7 |
 |
38mm 1/50 f/8 +0.7 |
2) Advanced Body design
From the first moment I held the F6 it was obvious it had been inspired by a photographer rather than an engineer.
As many have noted before, the F6 “just feels right”. The body size is a great match for all my lenses, even my large 80-400mm f/4.5-5.6
With a trend towards larger lenses – Sigma Art, Zeiss and Nikkor VR models – some 35mm bodies are too small. Less weight can be a bonus but not so a smaller size. The F6 dimensions are well judged, similar in size and weight to the D850.
Every dial, switch and button is appropriately sized and falls easily under my fingers. Many modern cameras feel cramped by comparison, have small fiddly controls or are difficult to hold with heavy lenses.
The F6 is a precision engineered instrument of the highest possible quality. Modern controls are all there: AF-ON, bracketing and function buttons; two command dials; S, CL, CH and CS drive settings; focus and AF area mode selectors plus an aperture lock that is useful with G-type lenses.
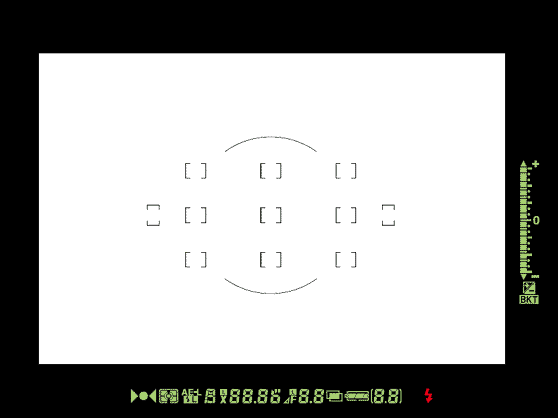
3) Bright Viewfinder
After my DX bodies the F6 finder was a revelation. 100% at 0.74x magnification puts it among the largest ever for a 35mm autofocus body, film or digital.
I like the exposure display on the side of the screen, giving a less cluttered view.
 |
F6 Viewfinder |
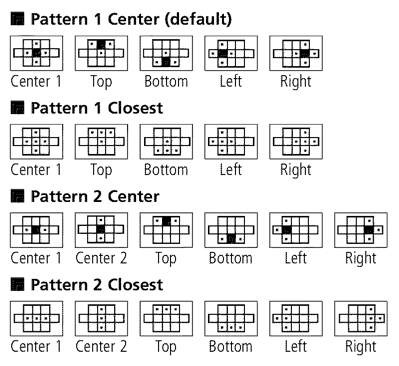
Eleven focus points (nine cross-type) may seem too few in a world obsessed by high numbers but they form an effective grid I have found to be infallible, even in fading light at f/4 or faster, tracking well at 5.5 fps at the rare times I need a burst. At f/5.6 the camera will lock on quickly using Group Area focus but won’t track fast moving subjects.
 |
F6 focus points |
Manual focusing is easier than I expected, superior to digital viewfinders I have tried though not in the FE2 class. This is a big step up from the F75 on which accurate manual focusing is not possible.
 |
Portra 800 24mm 1/6 f/4.5 +0.3 |
There is a built-in eyepiece shutter for tripod work and a diopter adjustment. Seven focus screens are available. I use a J type to help with manual lenses, although I feel more confident with manual lenses on my F3 with its split-screen viewfinder.
4) Rapid Response
I was instantly impressed with the speed of the F6. The combined shutter delay and mirror blackout is literally faster than the quick blink of an eye. I track action with the AF-ON button then “blink” with my shutter finger when the subject is in place.
I have seen the shutter lag quoted as 37ms on several sites, which would make the F6 more responsive than a D850 or D5…
Focus lock with Group Area Dynamic AF works as fast as my lenses will spin. I know the F6 will be ready to fire within a few milliseconds of lifting it to my eye.
 |
Portra 800 300mm+1.4x 1/200 f/16 +1.0 |
Even in hectic situations where I have had to swing from one end of a zoom range to the other for consecutive shots the F6 always focuses instantly.
I lose no time chimping, zooming to check focus, optimising histograms, changing menus or reshooting. I take a photo and move on.
The biggest speed advantage with film is I am always ready for the next shot. I don’t lose photo opportunities while scrolling through images on the back of the camera.
 |
Portra 800 24mm 1/500 f/8 +0.7 |
For motor sports I may add the grip for 8fps or buy an F5 for Portra 800 so I can leave Ektar in the F6. I borrowed an F5 recently. The shutter sounds like a Samurai sword slicing time!
The MB-40 has a full set of duplicate controls for vertical shooting including dual command dials. It can take AA or EN-EL4(a) batteries, just like the D3s.
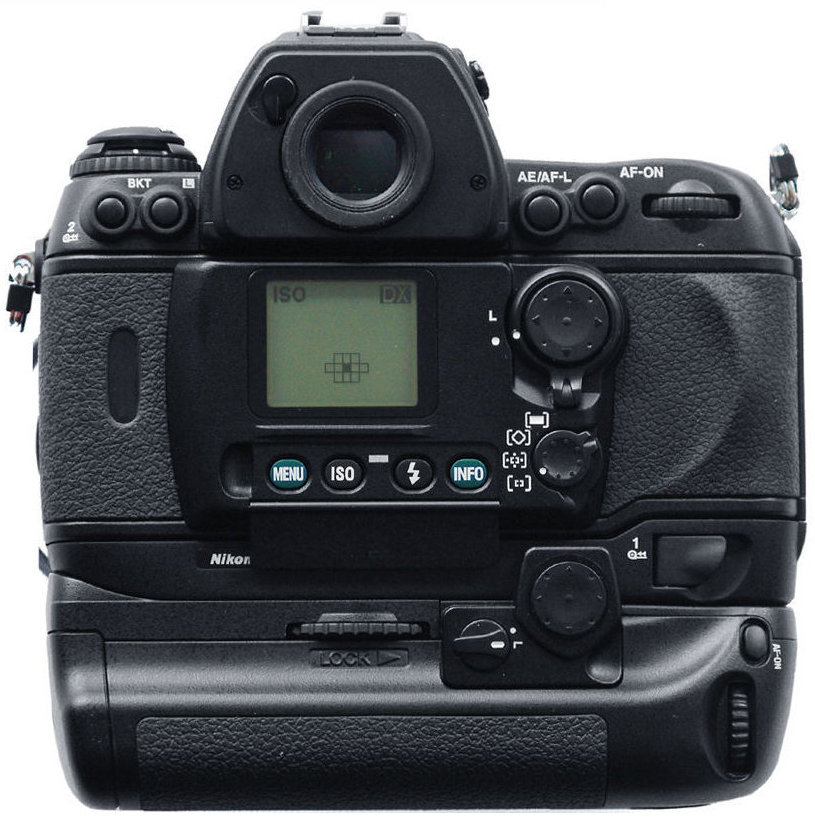 |
F6 with optional MB-40 |
5) Rear screen
This page from the F6 Instruction Manual shows the three available views of the rear backlit screen. The first complements basic data from the top LCD. The others show more complete data in two formats.
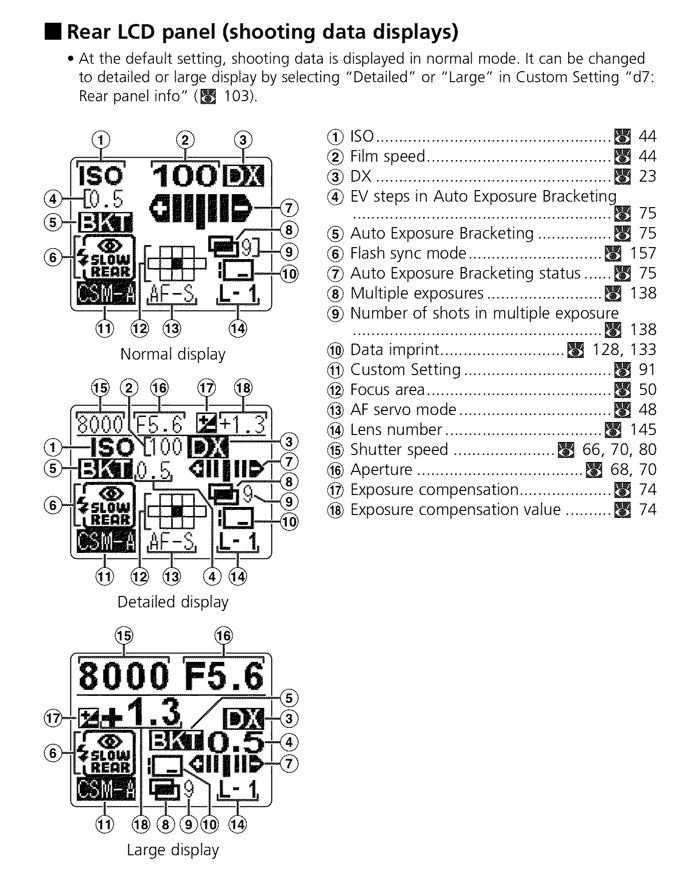 |
Four standard menu banks are available. Autofocus, metering, bracketing, flash and control settings are all here, tailored for film use. Other than using film instead of a sensor the F6 functions like a modern digital camera.
I can see my Group Area Dynamic AF setting on the rear screen. I find Pattern 1 Closest to be reliable for general photography.
 |
Basic EXIF type data is saved for at least 31 rolls, depending on the level of detail recorded, and can be viewed at any time.
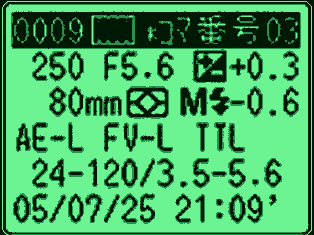 |
Shutter speed, aperture, exposure compensation and date are also imprinted on the negatives between frames.
6) Lens & Flash compatibility
The F6 gives me access to almost 40 years of Nikkor lenses including G and VR types, plus third-party AF and manual focus designs.
Manual focus Nikon Ai-S lenses work in Aperture exposure mode with colour matrix metering.
No Nikon film camera nor early generation digital bodies will focus with Nikon AF-P lenses. The new E series with electronic apertures will work but only wide open. Nikon’s new lenses are only fully functional on digital cameras made since 2012.
 |
Portra 800 24mm 1/13 f/8 +1.0 |
Battery life is seriously reduced when using the Sigma OS (VR) function. Lithium CR123A batteries are $2 to $3 each in bulk here in Australia. The F6 rarely gets more than 4 rolls per pair when I use the Sigma zoom exclusively.
Nikon and Tamron vibration control seems more efficient, allowing me to get 6 rolls. With manual focus lenses, battery life extends to about 10 rolls.
Flashes SB-400/500/600/800/900/910/5000 all work on an F6. I share an SB-900 with my D6.
Nikon lists the following film era flashes as fully compatible: SB-25, 26, 27, 28, 28DX, 50DX and 80DX.
Nikon publications
Bottom Line
For me the F6 is perfect. I can think about my images rather than about the camera. While my D6 is the ultimate camera for me for fast action, nature, fading light and dark interiors, I often choose the F6 as my walk-around camera on fine days.
Voigtländer Ultron 40mm f/2 SLII
 This miniature pancake design is one of the smallest lenses ever made for Nikon, only 24.5cm (1") long. It is also one of the lightest at around 200g (7oz).
This is a manual focus lens, best on FX film cameras such as the FE2 with a split focus screen or the F6 with a J screen. On an F75 manual focusing was very poor due to Nikon scrimping on the viewfinder optics. I also find it difficult to focus on DX bodies but it works well on FX bodies.
This Ai-P design communicates exposure data with the camera. Colour matrix metering and Program mode are possible on my F6. Think of it as a standard AF lens switched to manual focus. This is much like the 45mm supplied with the FM3a.
My original testing on a D200 was promising but the small viewfinder slowed my focusing speed. The DX format cropped the edges where great lenses show their worth. My concise review at the time was:
- f/2 – Meh...
- f/2.8 – Better than expected
- f/4 – Brilliant
- f/5.6 to f/8 – Bliss
I repeated my entirely non-scientific testing in my back yard on an F6 with Ektar 100 exposed at box speed. I used a tripod and self-timer for the midrange and distance shots.
→ View the middle distance series
→ View the far distance series
You can see more images from this lens in my blog entry for Street Organs.
I found it interesting that formal testing at Lenstip supported my observations.
This is a superb lens from f/4 to f/8 and so small there is no excuse to leave it at home. Highly recommended for all FX round-eyepiece Nikons, film or digital.
My updated review now stands at:
- f/2 – Meh...
- f/2.8 – Hmmm...
- f/4 – Brilliant
- f/5.6 – Bliss
- f/8 – Brilliant
Portra 800 for colour and B&W
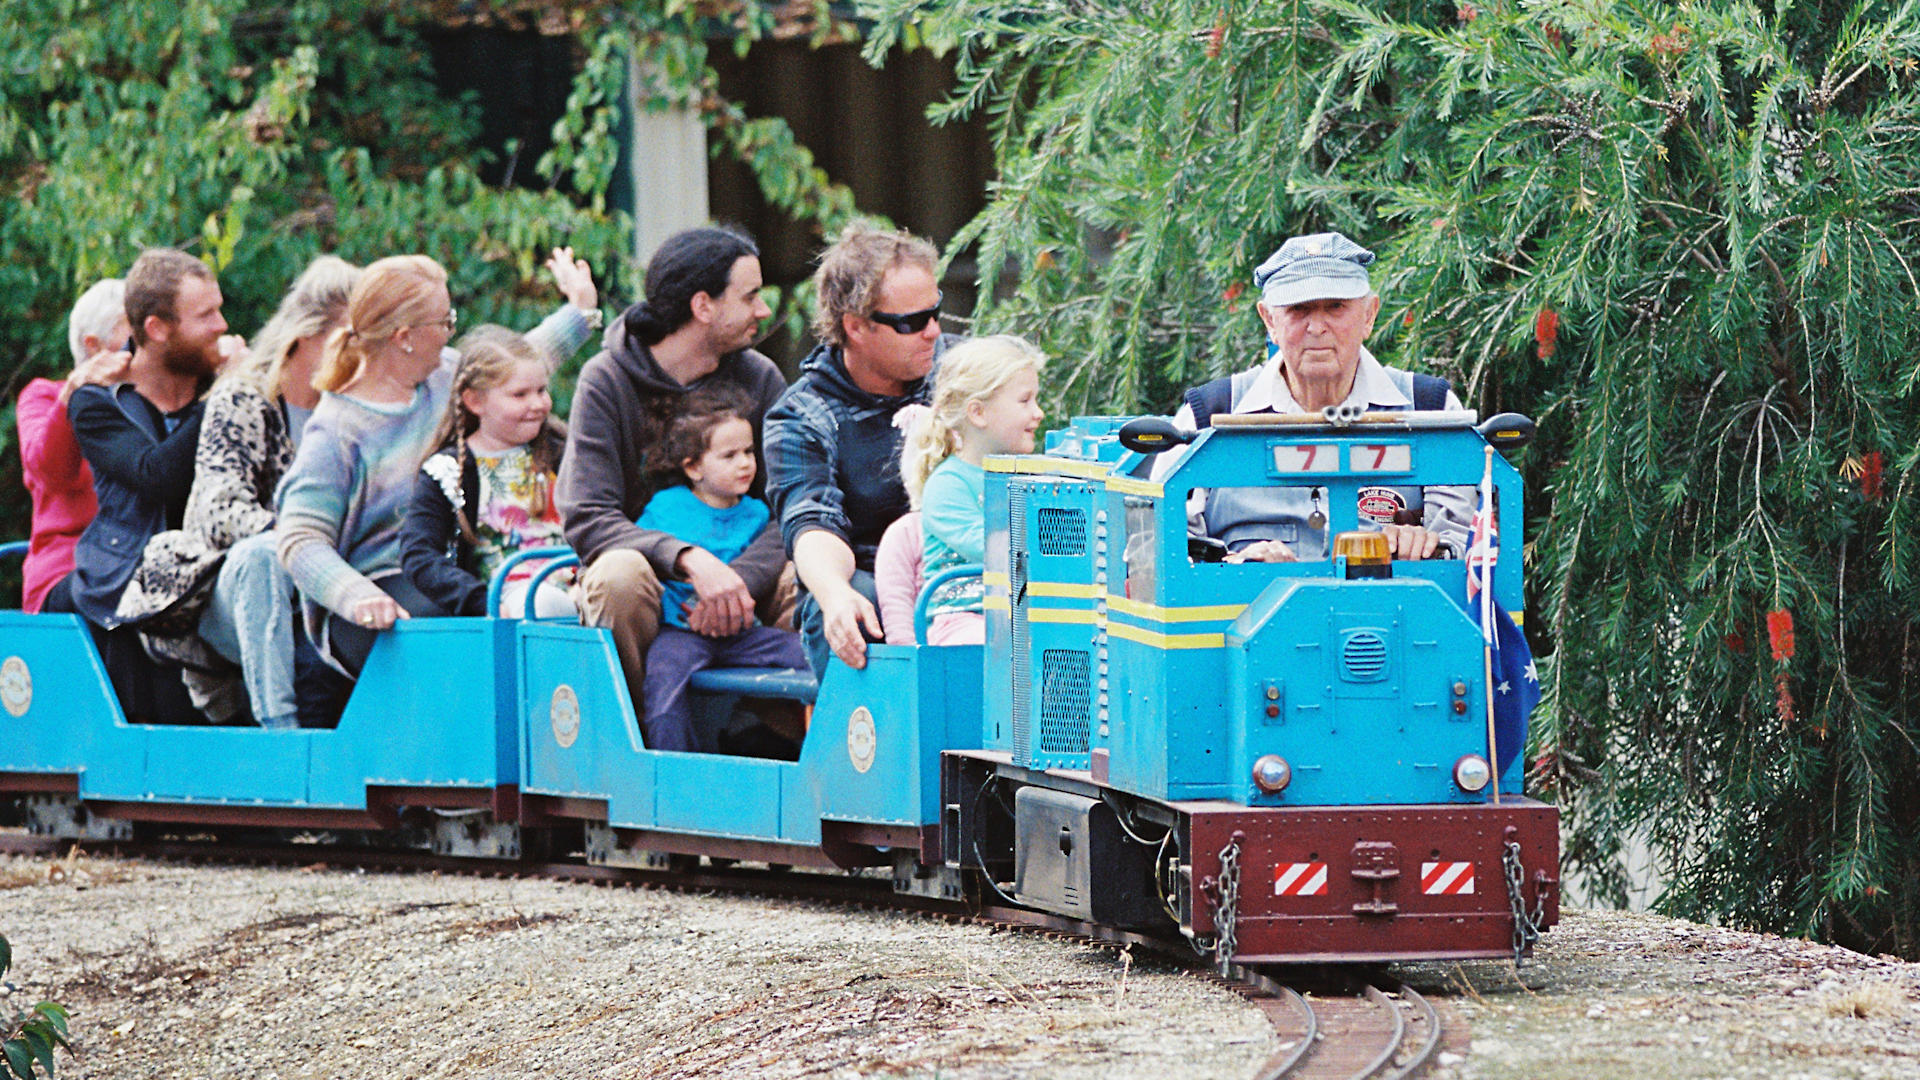
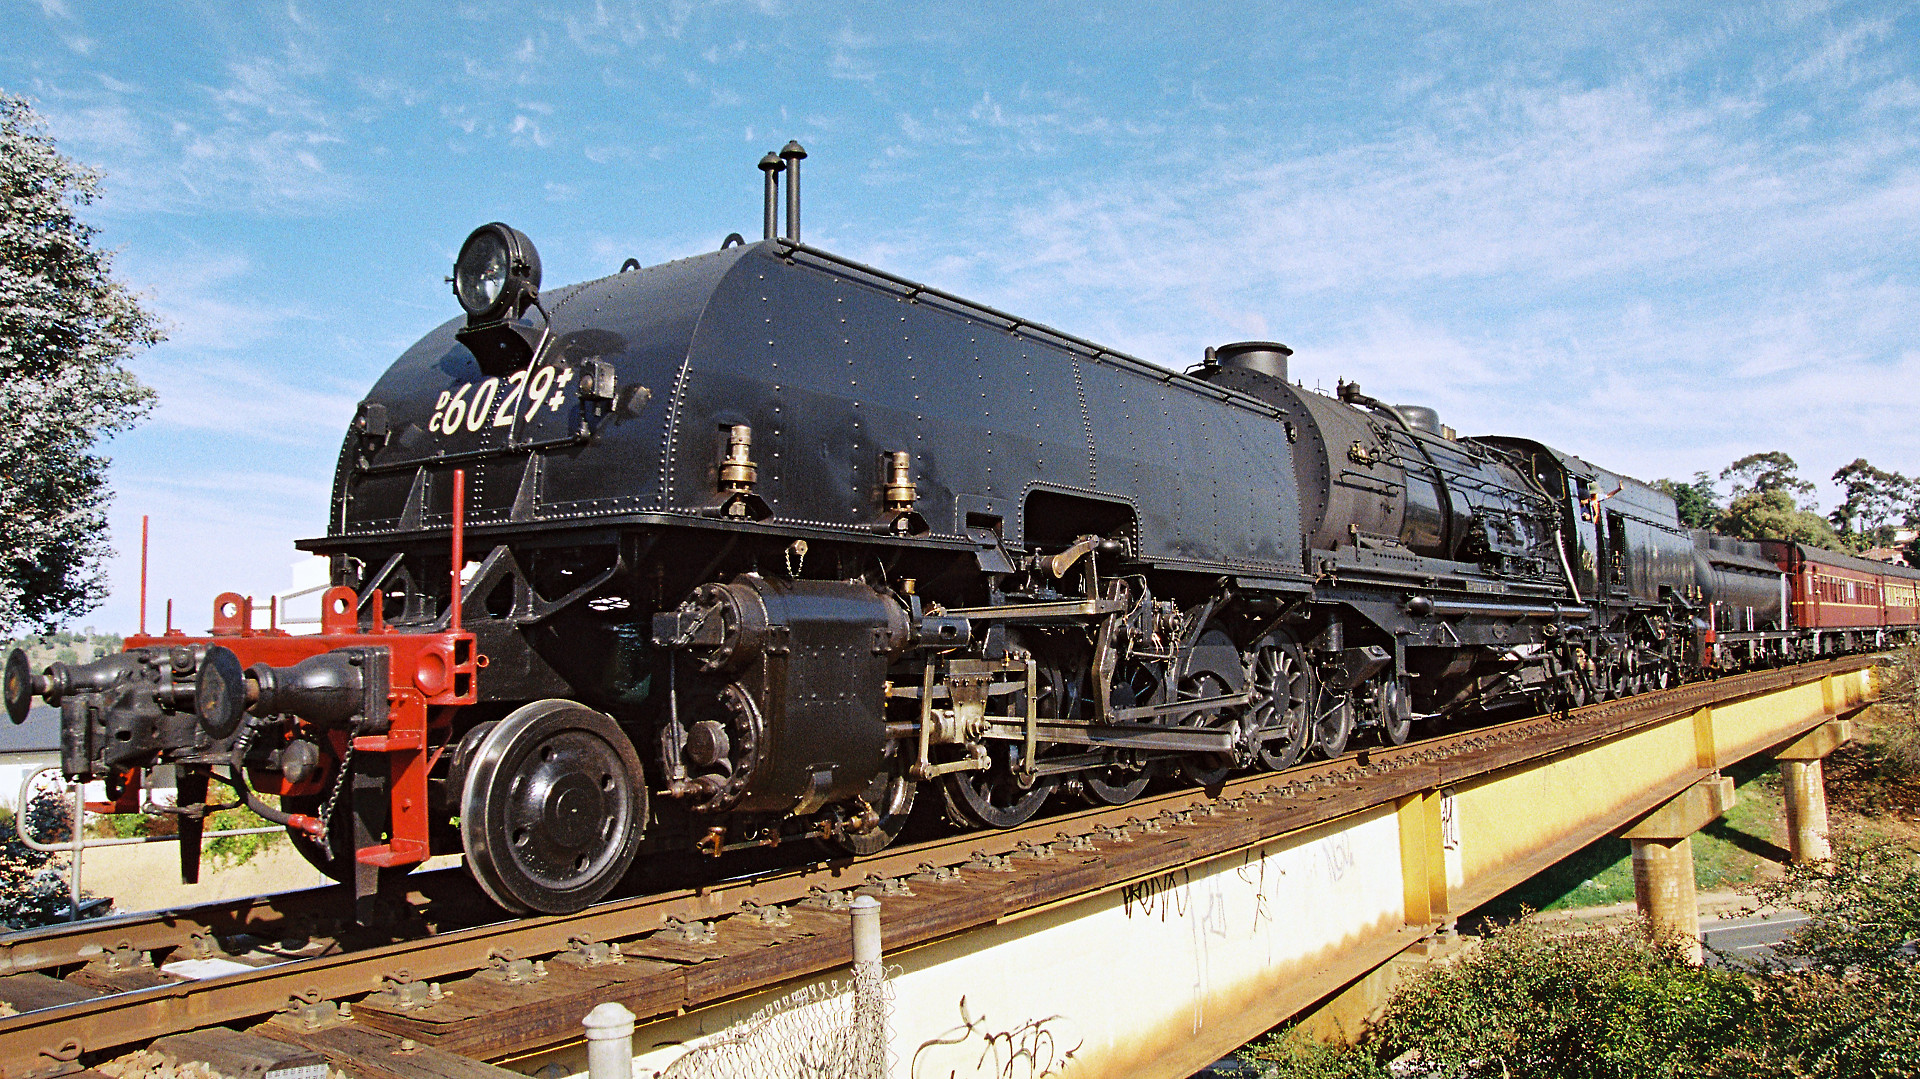
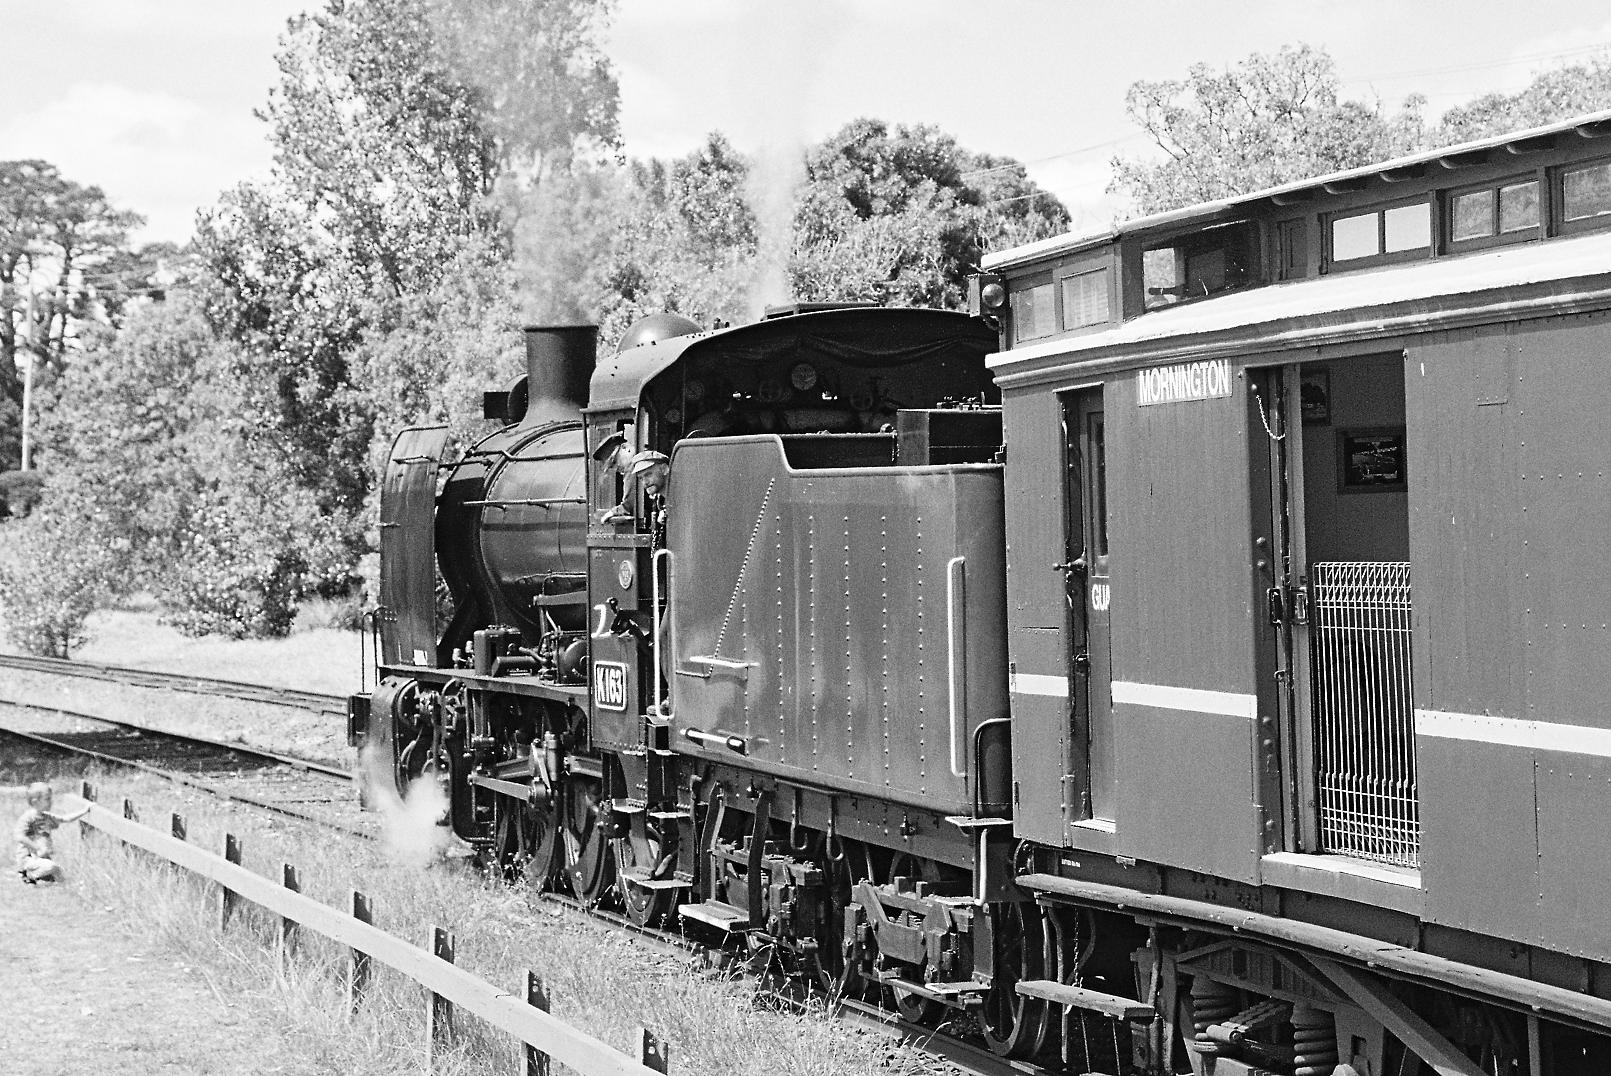
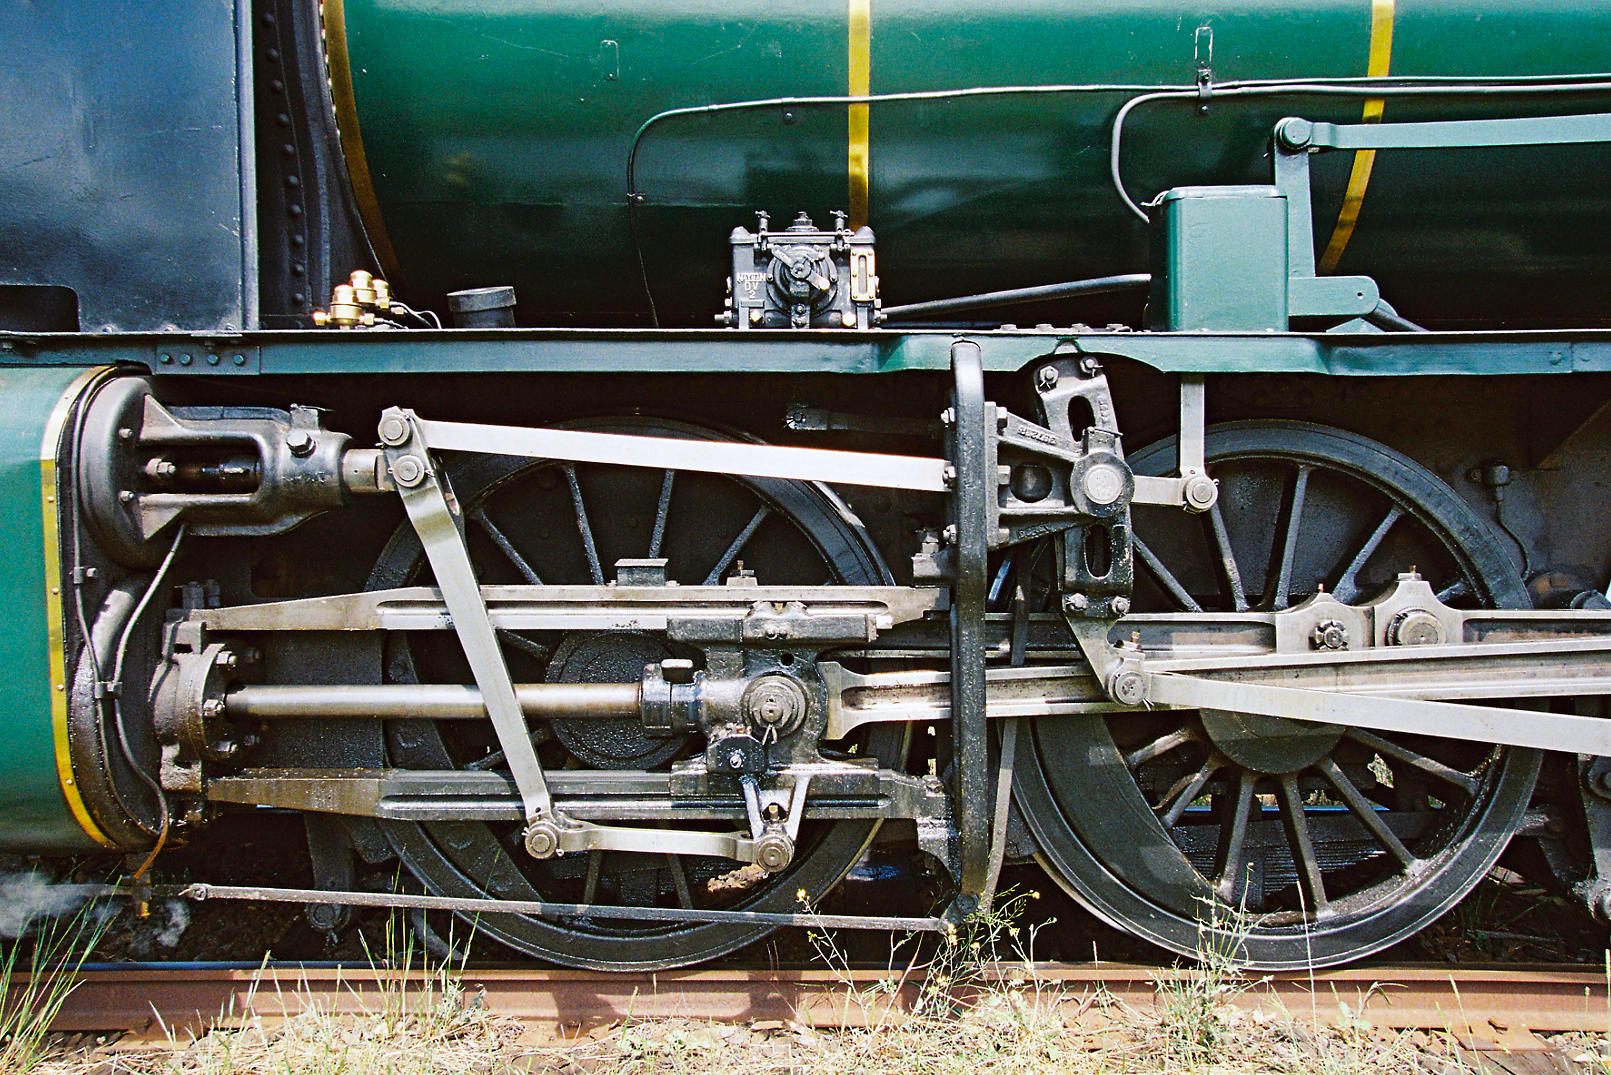
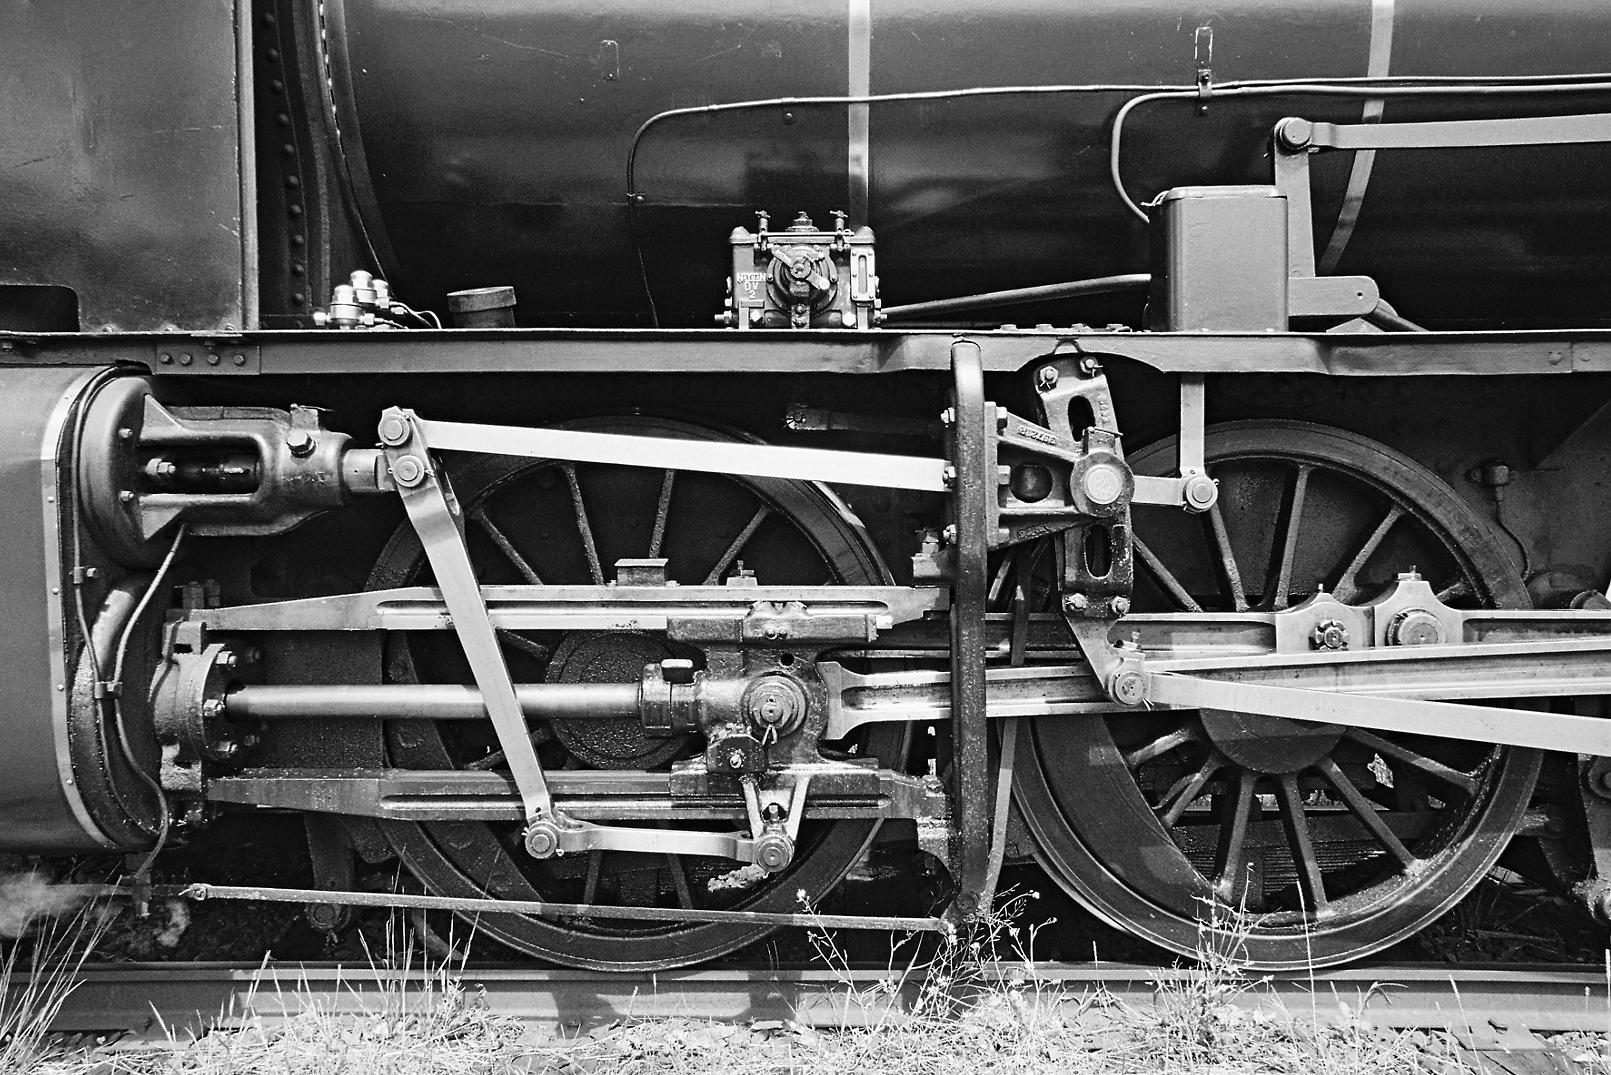
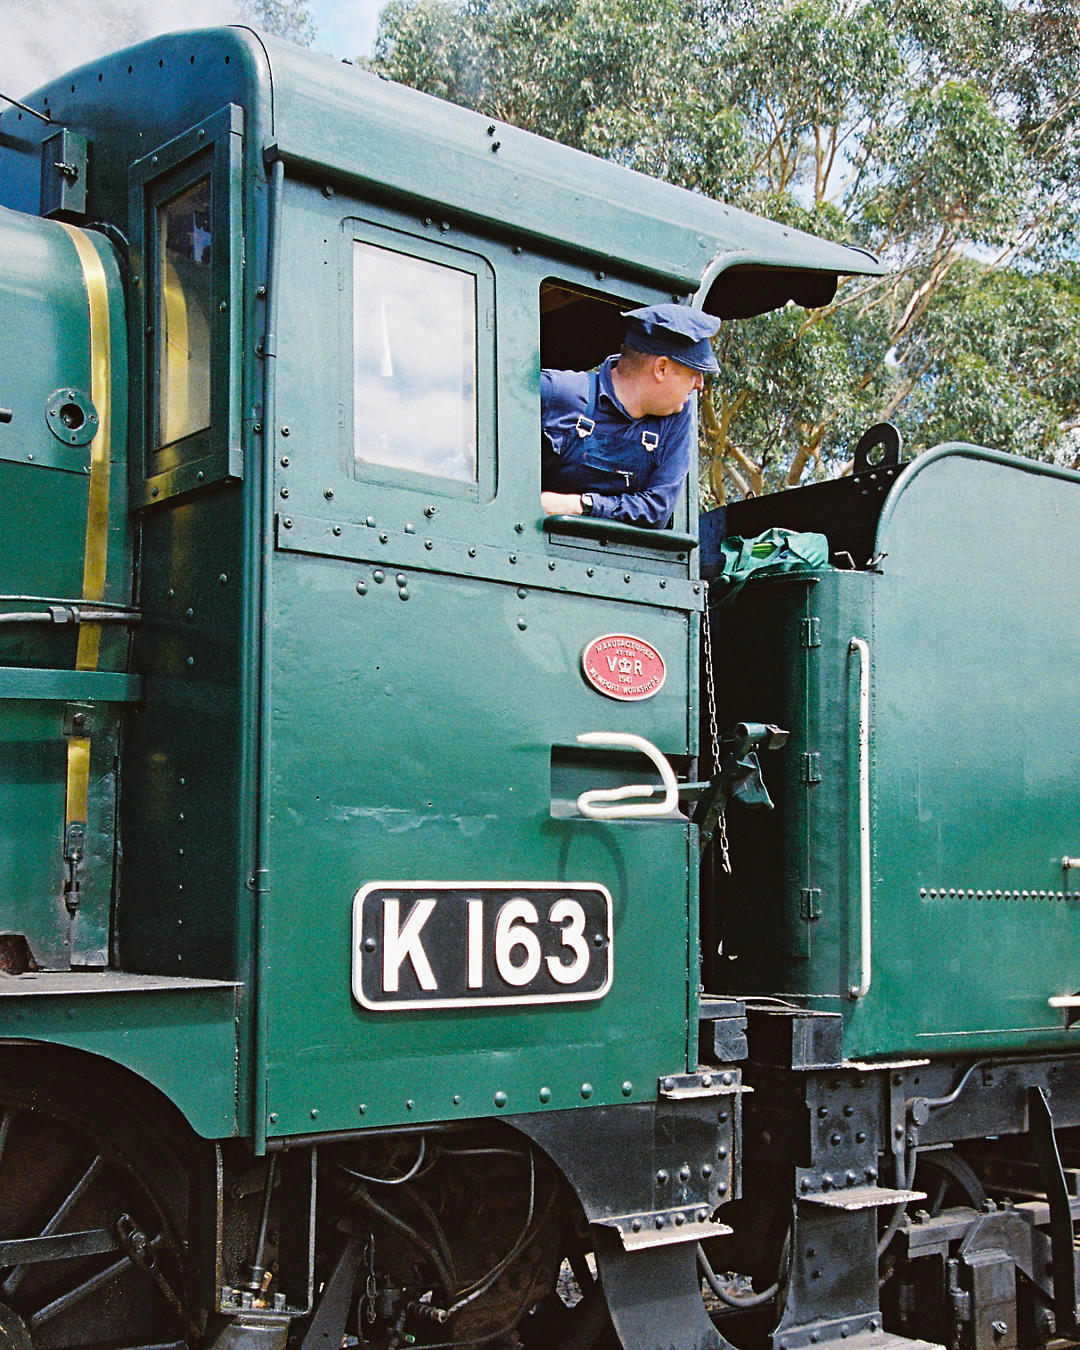
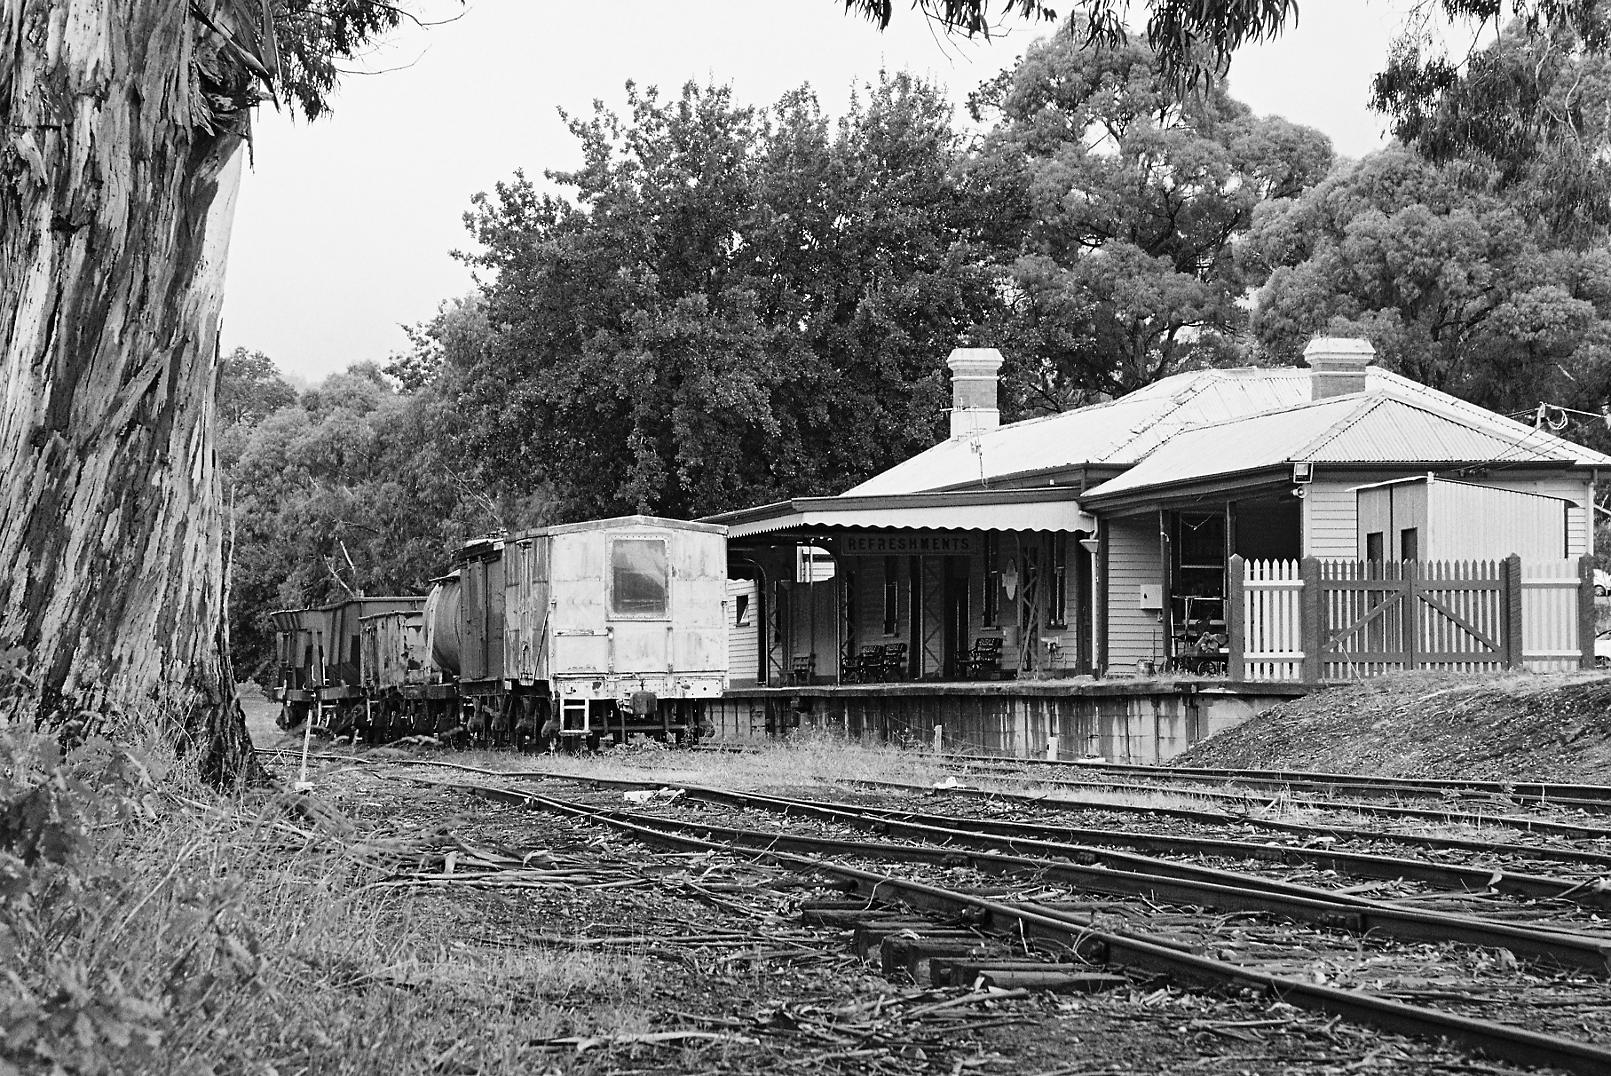
I headed to Melbourne for a long weekend without knowing exactly what films I would need. I suspected some B&W shots would suit the trains at Healesville and Mornington but I also wanted to capture the colours of the historic locos and rolling stock.
I decided to go with Portra 800 at EI 400 on a Nikon F75. I left my meter on auto matrix and the Sigma 24-105mm at f/8. Images were scanned at 19MP resolution by Foto Supplies Albury.
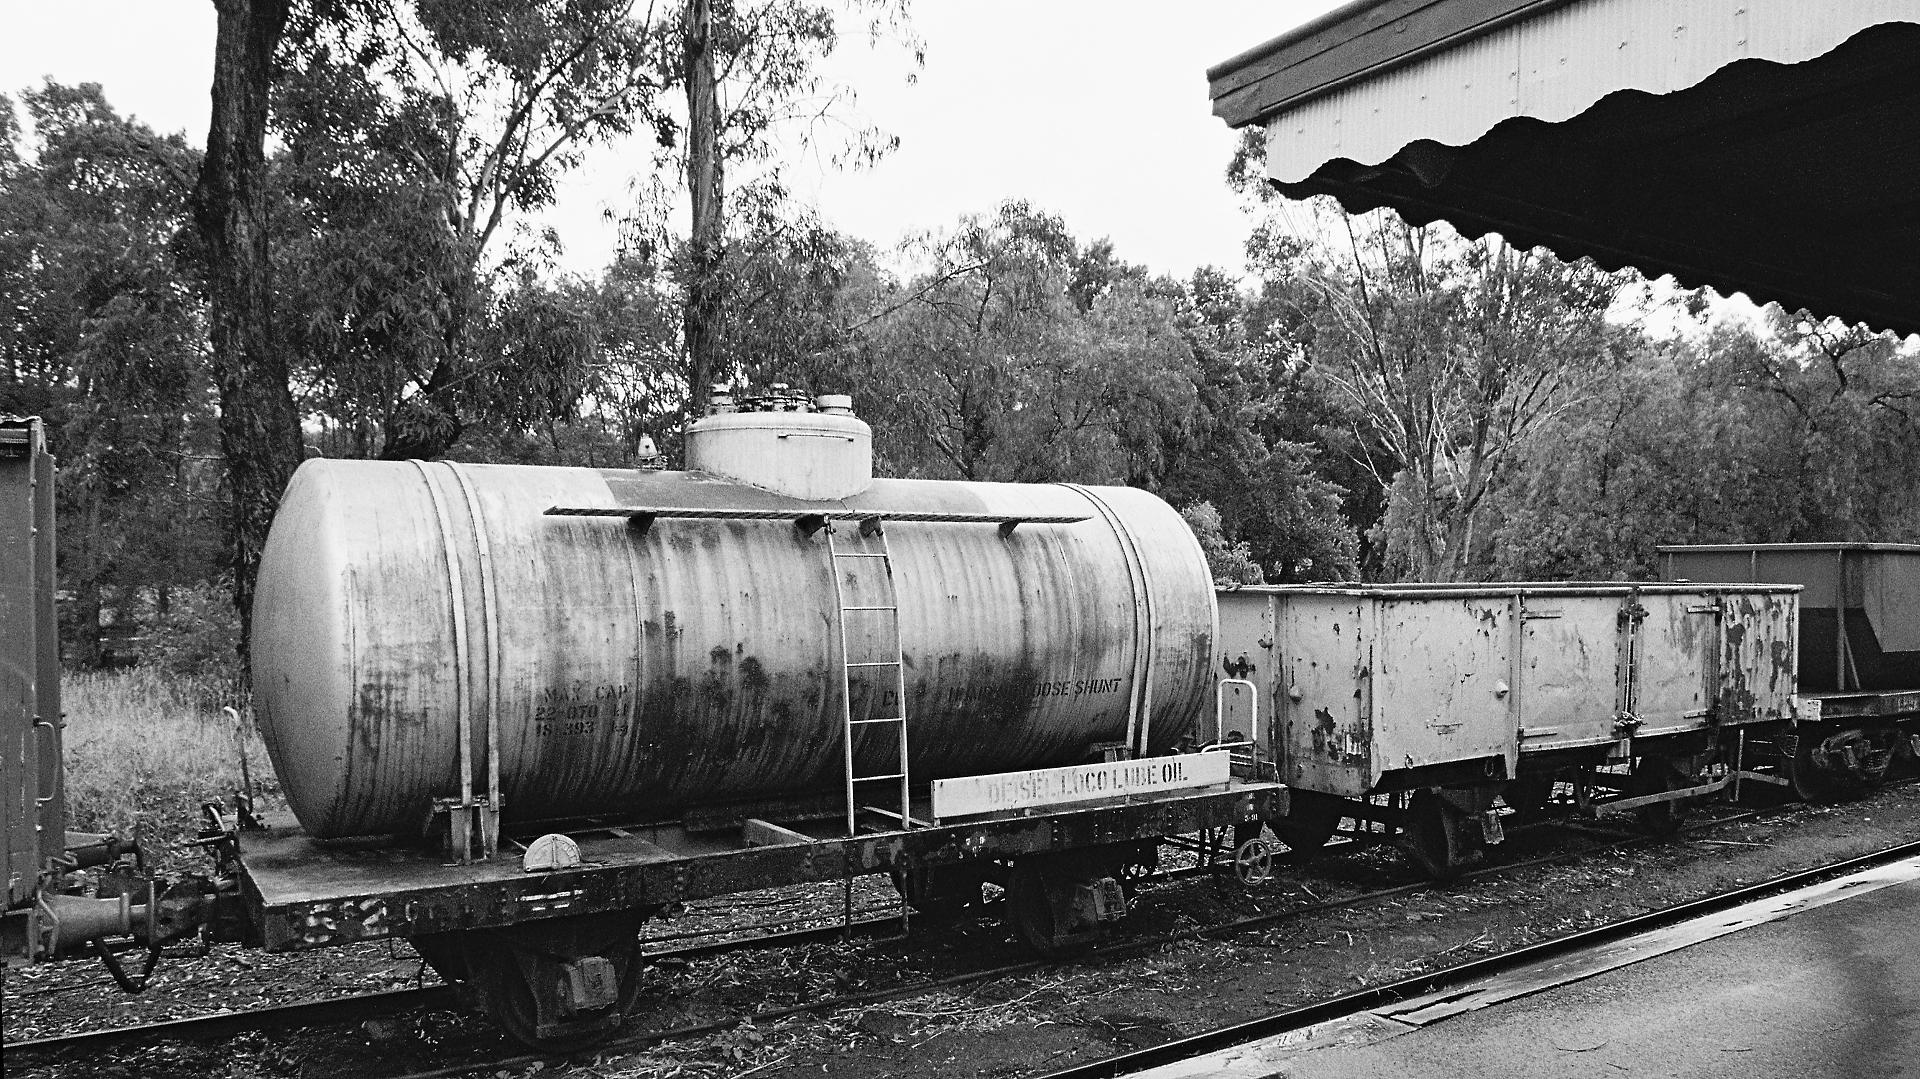
B&W images were converted with the default DxO “B&W” style.
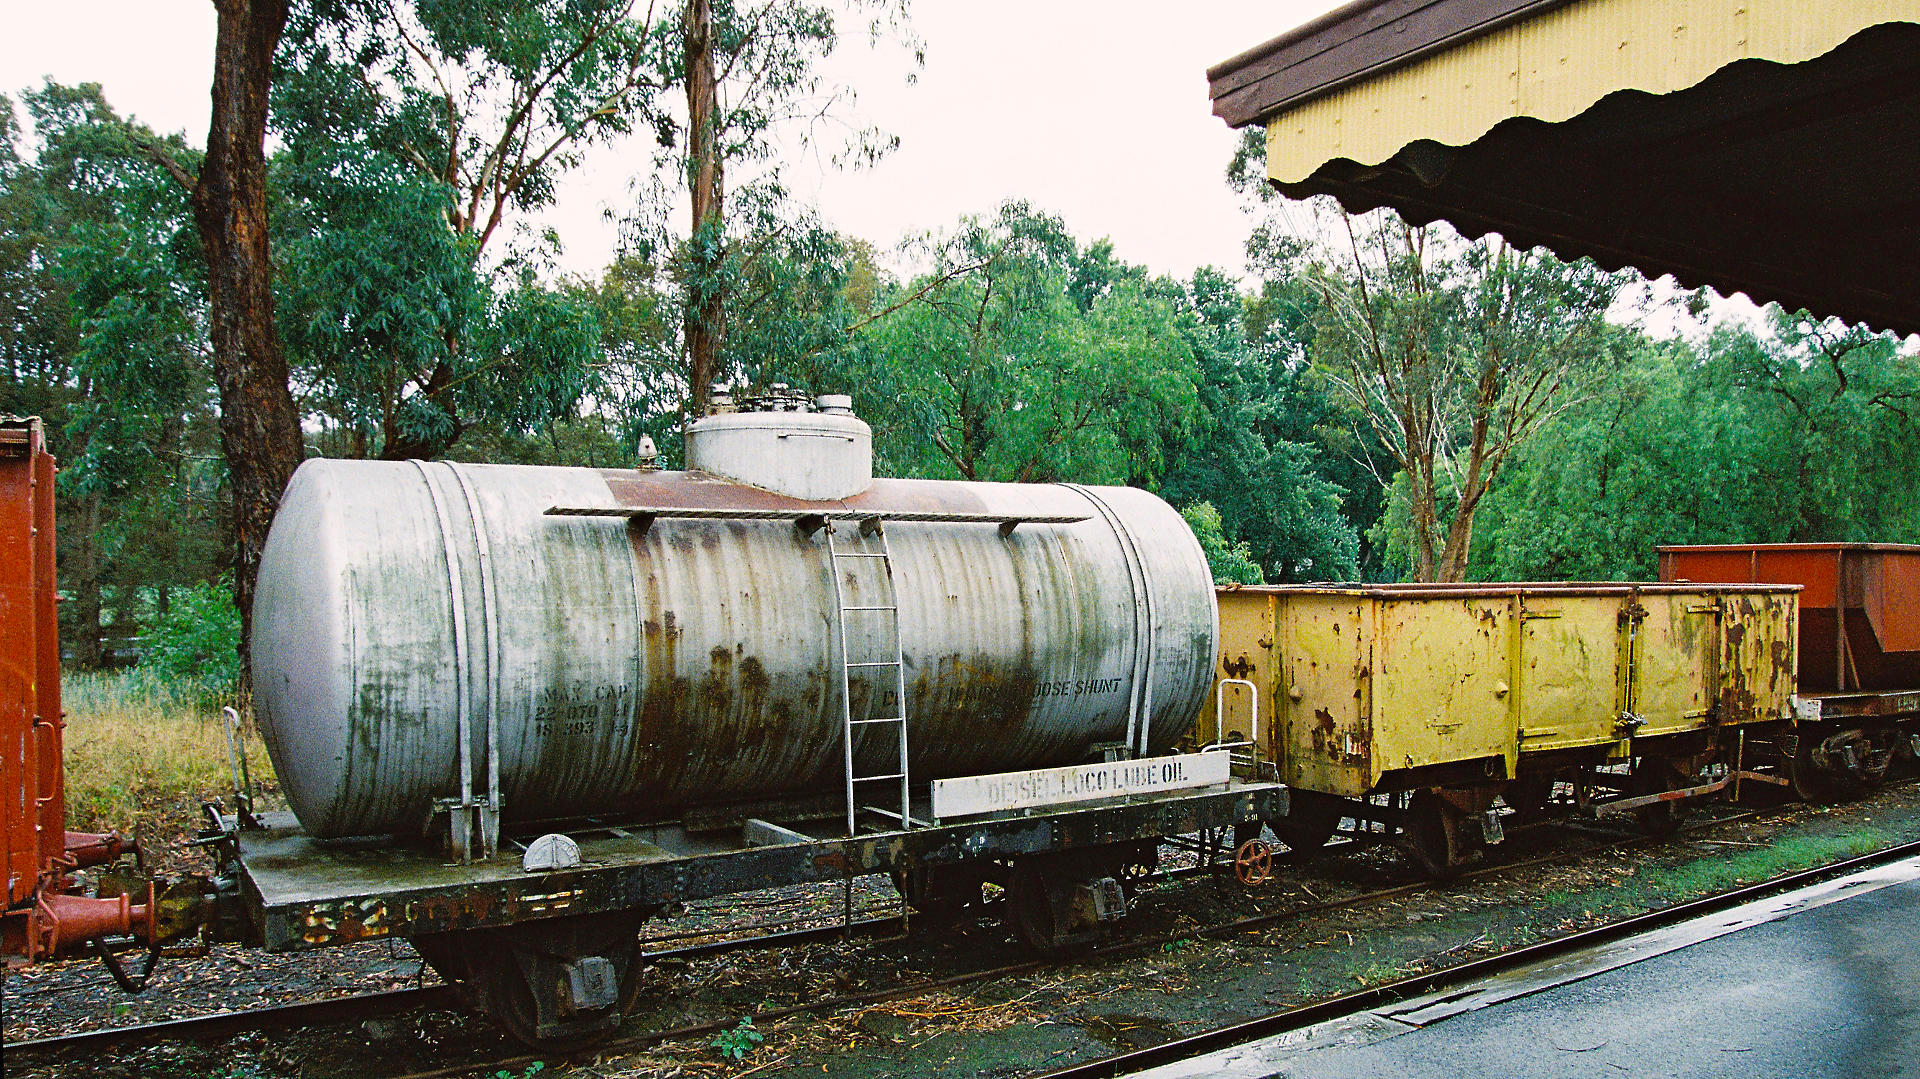
The Mooroduc to Mornington train was running so I took advantage of a lovely day to take a ride. This is a well presented tourist railway with clean, comfortable carriages, sparkling locomotives and pleasant staff. Highly recommended.
 |
 |
 |
 |
 |
 |
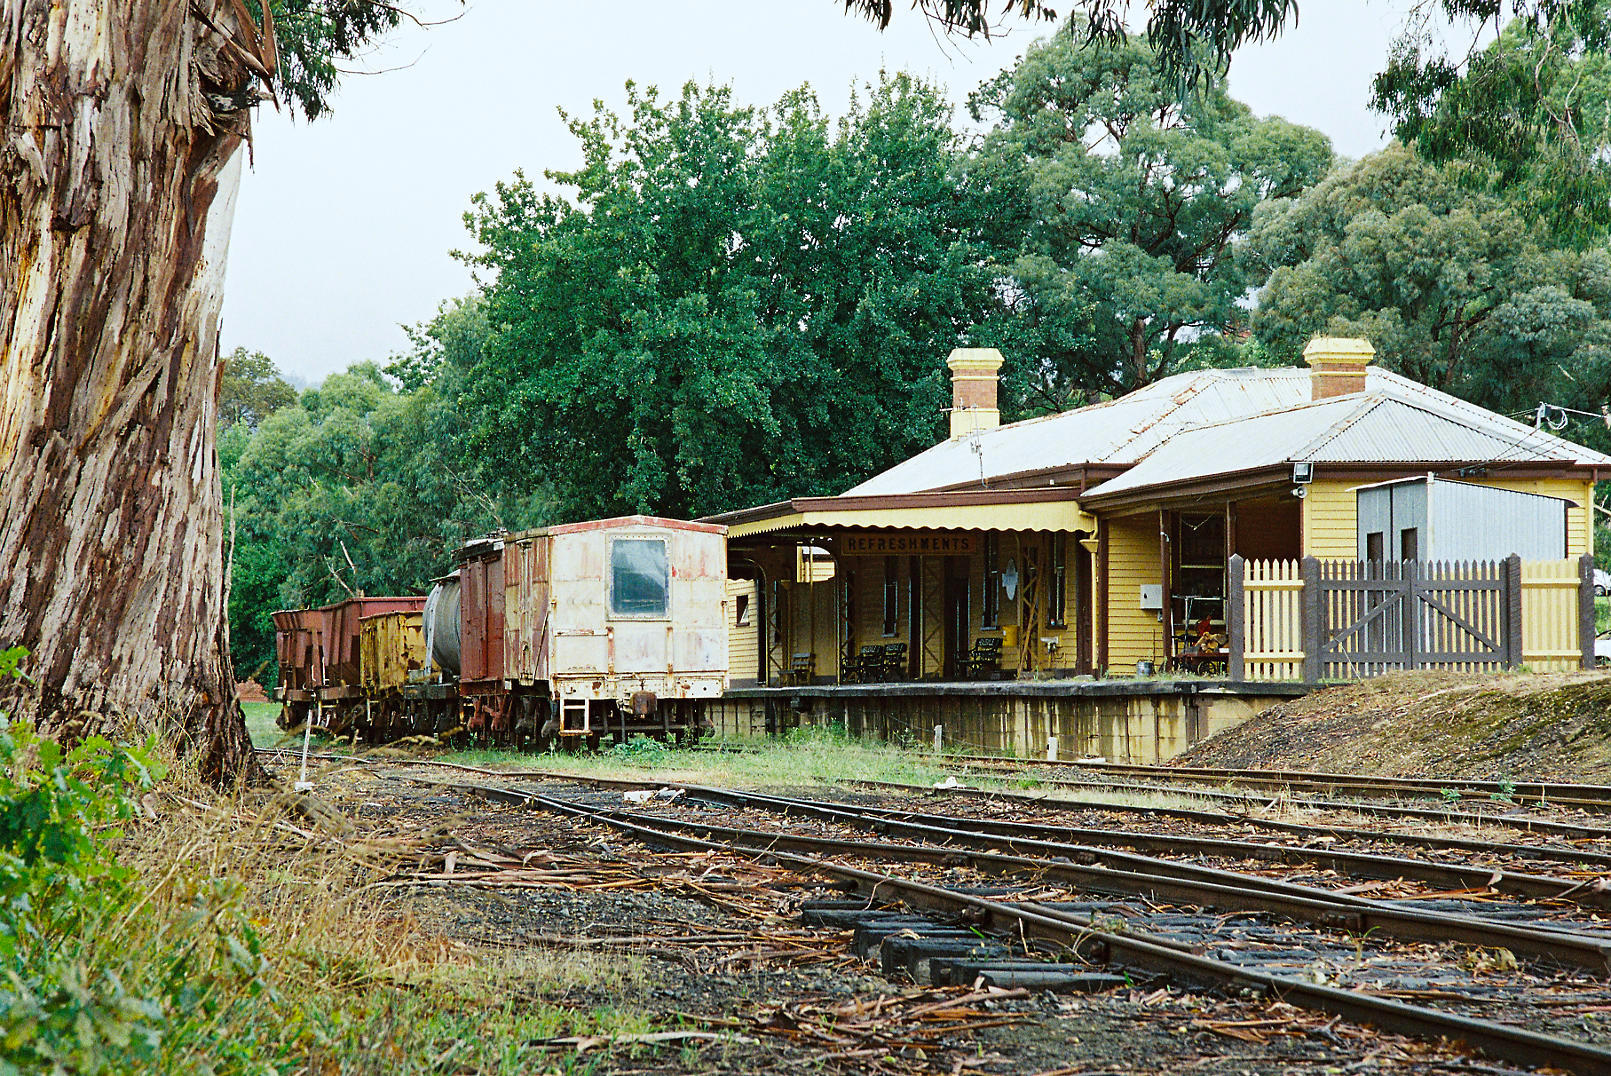
I also visited the Yarra Valley Railway at Healesville. No trains were running but I enjoyed a coffee and sausage roll at the cafe inside the original station building. I was able to explore the site as I wished, resulting in some happy memories of my visit.
 |
 |
 |
 |
Fixing perpective with DxO
I wanted to capture a large wall-mounted transparency and a WWII recruiting poster at the Temora Aviation Museum. Both were about 1m wide. Due to the odd shooting angle that was forced on me and my obvious error in getting the horizon straight the initial scans of my Portra 800 negatives were not promising.
I find Apple Preview is strong in the white balance and sharpening areas but does not have any perspective controls. DxO has excellent noise reduction, colour channel curves, horizon alignment, cropping, vignetting and distortion controls, and remarkably effective perspective tools. Between the two programs I was hopeful of saving something.
Here are the classic "Before" shots, as developed and scanned by the corner photo shop. I have only resized them from a height of 3,637 pixels to 1,080.
 |
 |
For the aircraft shot I used the DxO Force Rectangle Tool, matching each corner of the selection marquee to the giant transparency. This fixed the horizon and squared up the image. I then cropped this area.
I switched the Vignetting control to manual and set the slider to 100% which reduced some of the dark corners. I really needed a 200% setting here due to the strong central light source.
I used the individual channel curves to increase red in the middle and lower range and decrease green in the upper range. This gave me some semblance of silver planes, blue sky and green fields.
As usual there was little Chrominance noise in the scans but I found a 25% setting for Luminance noise improved matters.
My final step was to export the image as a 90% jpeg then open it in Preview. Multiple processing of jpeg images is not generally recommended especially if you are altering the contrast, but I have found these 19MP scans hold up well to the DxO/Preview duo.
The white balance of Preview works best on silver areas if you can find them or white if necessary. In this case I had two silver aircraft so it was a simple matter to click on a few sections of fuselage until the general effect looked OK. My final choice was a rear section of the twin-tailed Vampire. The vignetting is still obvious as are some damaged parts of the original slide but now I have something I can use.
The recruiting poster was handled in much the same way but without any vignetting adjustment. The lighting was a horrid mix of daylight and fluorescents so the final white balance is not consistent across the frame, but the DxO tools again worked well.
 |
 |
Ektar 100 latitude
Ektar 100 is a special film, always in the fridge ready to go. The slow ISO rating is borderline for many situations although vibration reduction lenses help. I had always used this film at an exposure compensation of +0.5 but never actually tested it over a range of exposures until now.
 |
Here are the results from EI 280 to EI 35, shot from my front door. As expected from my experience with Portra 800 I like the colours and shadow detail from my F75 with matrix metering at box speed or +0.5 or EI 70.
These images have had no post-processing other than resizing of the 19MP scans.
Portra 800 review
As I write this in 2014 my fridge has a healthy supply of Kodak film, each with its own appeal.
- Ektar 100 - almost invisible grain, sparkling landscape colours
- Portra 800 - good skin tones, handles mixed lighting well
- BW400CN - smooth B&W tones from any C41 lab
And yet there are times when I get caught with the wrong film. An outdoor tourist walk with an F75 suddenly moves indoors and Ektar won’t work, even with the excellent stabilisation of my Sigma 24-105mm. You need the MB-18 grip on an F75 with large lenses like this.
My F90x is a joy outdoors but doesn’t support VR so BW400CN suddenly becomes a problem in failing light. And so it goes…
I have only recently begun using Portra 800. After trying a few other films that showed huge grain, high contrast and lurid colours I was wary of anything faster than Ektar. Portra 400 is a great film but not fast enough when I needed to move up from Ektar.
Now I have run a few rolls I am coming to the conclusion that for me Portra 800 may be the best all-round film for colour or monochrome (with DxO Photolab, Photoshop etc) on those days when I have only one camera body with me.
More often I find myself loading Portra 800 into an F75, one of the few film bodies that will run with the latest "G" and "VR" lenses (Sigma calls this "OS").
I wanted to know how this film responds, so in a pedestrian shot of my house I exposed Portra 800 from three stops under to three stops over. I wanted to know the optimum setting for outdoor matrix metering on my F75.
 |
Using more common 1/3 stop increments the best practical film speed for me would be EI 500, an exposure compensation of +0.7. Different cameras and metering modes vary. You should run a similar test with your own gear.
This is a genuinely fast film. It is entirely possible some cameras will give the best results at the box speed of ISO 800. A lot depends on your choice of metering mode and whether your technique is to “expose for the shadows”.
Outdoors there are times when high speed film might be the wrong choice. It is difficult to use slow shutter speeds to emphasise movement - not good for propeller blur at air shows. Wide apertures for shallow depth effects become limited by your maximum shutter speed so outdoor portraits become difficult.
The F75 only runs to 1/2000 but Portra 800 will happily accept three stops over exposure. I can shoot on manual, select a wide f-stop, let the camera fire at top speed and know the film latitude will handle the rest. As shown above, nothing bad will happen!
A Sunny 16 setting for a bright day with Portra 800 at EI 500 would be f/8 or f/11 at 1/1000. Trying for f/2.8 gives shutter speeds above the capability of my F75, but probably OK for the F90x. Some shutter specs are below. Several models have different names depending on where they were sold — an F75 is identical to an N75.
- 1/1000 – EL2, FG
- 1/2000 – F3, F75
- 1/4000 – FA, FE2, FM2n, FM3A, F80
- 1/8000 – F801, F90x, F100, F4, F5, F6
A variable neutral density filter can help if you need longer shutter speeds, although some introduce problems of their own. Lloyd Chambers recommends Breakthrough Filters.
In summary, Portra 800 in my F75 with matrix metering works brilliantly at any EI between 200 and 560. At a pinch you can use very slow shutter speeds by turning your meter down to double digits and maxing out the exposure latitude.
My recommendation for beginners with Portra 800 would be to set the camera meter to 400 (exposure compensation +1.0) and leave it there. No working camera meter is ever going to give you an unprintable shot at that setting.
I have projects in mind that will need longer shutter speeds so I will keep a supply of Ektar on hand. Also, for places rather than people it really is unbeatable for the clarity and impact it can give.
And so to B&W conversions using DxO. Similar results can be achieved with other post-processing software. I use DxO because it is relatively inexpensive and easy to learn.
One common procedure for digital photographers is to recreate a classic B&W film look to their images, so tools for this are well developed. By starting with a colour negative scan you already have authentic dynamic range and surface texture so you only need to decide how the colours will be presented as monochrome tones.
Here is how the default DxO B&W control renders Ironman.
 |
 |
Not bad for B&W at EI 560 but it’s not in the same league for fine grain and smooth tonal gradations as Ilford B&W or the amazing Fuji Acros 100.
I also like ADOX Silvermax 100. In a future test I will see how close I can get with Ektar.
Can Portra 800 work at EI 1600 in B&W? At that speed on my gear it breaks up in colour although it is worth a shot if you need the shutter speed.
Here are the -1.0 (EI 1600) and -0.5 (EI 1100) images with a little further processing in DxO. The higher speed doesn’t do it me for, but the EI 1100 comes close to success I think.
There was no “Push processing” here. These negs came straight from a standard develop and scan at a C-41 one-hour lab.
 |
 |
I have no hesitation in shooting Portra 800 as a B&W film at from 200 to 1000. For me that’s up to two stops faster than BW400CN at EI 250, albeit with more grain and a completely different look.
You need accurate exposures when rating colour negative film above box speed. There is no room for error and close enough probably won’t be.
If you need higher speeds or just prefer the crunchy look then it is time for darkroom alchemy to push some Kodak T-Max 400 or Tri-X, Ilford Delta 3200 or Fuji Neopan 400. Note to self — “Where is that Patterson tank and thermometer?”
Below is a particularly tricky lighting situation. It was something like 24mm, f/5.6 at 1/15. Tinted skylights, murky green fluorescents and stadium halogens all conspired to ruin my shot.
My F75 was set to +0.5 compensation (EI 560). A click on the white area of the Atlantic sign behind the car with the DxO white balance tool gave me the effect I wanted. The green floor on the right of the shot came courtesy of a fluorescent tube!
 |
 |
The next set shows the effects of all DxO’s virtual filters.
And finally to the point of this article. Can I use Portra 800 as my main film stock for colour and monochrome? For me the answer, as in all things, is an unqualified Hmm…
If I have no idea what I will be shooting then the answer is yes. Portra 800 really is fast, solving more problems than it creates. I see only a barely perceptible increase in texture over Portra 400.
With the right lens to fill the frame I have no problem with the detail I can record. The colours are as vivid or pastel as I make them in post-processing and can be easily corrected for any light source.
In mid roll I can switch between my preferred EI colour rating of around 500 to a B&W rating of up to 1000 in failing light. Monochrome options in post-processing software can provide excellent results.
If I know I will be shooting a full roll of B&W then Ilford XP2 will still be my choice. There are times when I leave home without any colour film to make myself see things differently.
I can’t imagine the shot below of Yass Station being improved in colour — BW400CN, F90x and Voigtlander 40mm f/2.
On a sunny tourist walk when structures, trees, rivers and parks are the main subjects Ektar will be in the camera. Backlit on a computer screen or HDTV this film has all definition and vibrancy I need.
 |
 |
Recreating the look of film with DxO
My favourite 35mm film Fuji Reala 100 is lost forever. Or it is?
With cameras like the D850 it may be possible to mimic extinct film stocks very closely. More pixels should mean more accurately rendered grain. Greater dynamic range should make simulating the response curves of various films far easier.
For my tests I only had a Nikon D200, a well designed semi-pro body but held back by an older sensor. I found it to be a fine camera in the field if used at ISO 100, processing RAW files with DxO Optics Pro 9. With top quality lenses, preferably VR, the D200 is capable of excellent daytime images, with print sizes up to A4 (12x8).
My method was simple. Take a well exposed shot on the D200 then produce default simulations of the currently available options in DxO Filmpack 4. There is nothing new about trying to recreate film textures from RAW files (some Fuji digital bodies have a variety of built-in film renderings) but since I have not been able to locate a full set of DxO examples on the web I thought I would provide some myself.
Specifically I was looking for a good Fuji Reala 100 effect but there are other wonderful textures and tones from other attractive films I never used. Fuji Astia for example, or Ilford Delta 100. Some of the negative films are still in productions but almost all the slide films are gone.
 |
 |
 |
 |
For digital photographers I hope there are some ideas here for easily creating a more individual look. For film buffs here is a chance to get a feel for an emulsion you may not have tried. Try something new!
There are notable omissions such as as Polaroid Type 55, ADOX Silvermax, Fuji 400H and Portra 800. I would also love to try older types like Autochrome. Gurus like Mark Abeln are able to do such things in Photoshop.
Importantly, the following samples are attempting to recreate the grain, contrast, spectral sensitivity, dynamic range and characteristic response curves of film based only on a D200 RAW file.
Does DxO reverse the data from the RAW file to imagine the original scene then retake the image with virtual film? Is a RAW file even necessary or does DxO just map a new colours, curves and textures onto any image? I don’t know, but the possibility of recreating extinct film styles is intriguing.
I hope these images are of interest to those wanting to give a different look to their digital images. File names show the film type being simulated, or mouseover to see the Tooltip description.
→ View the colour print series
→ View the colour slide series
There is no Truth in all of this. Just a few more digital tools to play with, and a chance to find new ideas for processing digital images.
Personally, I have gone back to real film for the look I want. 😎